By CMS module
Use case
If the web site of the merchant is built with one of the popular Content Management System (CMS) listed below, the integration should be completed with the corresponding Pledg by Sofinco module:
| CMS | Integration mode | Available languages |
|---|---|---|
| Magento v2 | Redirection to a page containing the plugin | EN, FR |
| Prestashop v1.6 | Plugin | DE, EN, ES, FR, IT, NL |
| Prestashop from v1.7.4 to v9.x | Redirection to a page containing the plugin | DE, EN, ES, FR, IT, NL, PT |
| Sylius | Redirection to Pledg | DE, EN, FR |
| Woocommerce | Redirection to Pledg | DE, EN, ES, FR, IT, NL |
| Shopify | Redirection to Pledg | EN, FR, DE |
| Joomla | Redirection to Pledg | FR, EN |
| Odoo | Redirection to Pledg | FR |
Magento v2
Step 1 - Account creation
As a prerequisite, for every merchant / payment solution, an account ID (merchant_uid) has to be setup by Pledg integration team.
Step 2 - Installation
The installation, the upgrade and the uninstallation of the module are done via PHP Composer.
Prior to execute the commands, you need to connect using SSH to the server and go to the Magento root directory.
In the following example, the Magento root directory is /var/www/magento

Installation
bash
composer require pledgbysofinco/module-pledgbysofinco-payment-gateway
php bin/magento module:enable Pledg_PledgPaymentGateway --clear-static-content
php bin/magento setup:upgrade
php bin/magento setup:di:compile
php bin/magento setup:static-content:deploy <languages>
php bin/magento cache:clean
Upgrade
bash
composer update pledgbysofinco/module-pledgbysofinco-payment-gateway
php bin/magento setup:upgrade
php bin/magento setup:di:compile
php bin/magento setup:static-content:deploy <languages>
php bin/magento cache:clean
Uninstallation
bash
php bin/magento module:disable Pledg_PledgPaymentGateway
composer remove pledgbysofinco/module-pledgbysofinco-payment-gateway
Step 3 - Configure your Magento shop 🔧
In the administration interface of Magento, go to Stores > Configuration > Sales > Payment methods > Other payment methods.

Set the General Configuration

Fields description:
- Staging: enable or disable depending on the environment
- Enable widget in product page: Enable or disable widget on product page
Set up your different payment solutions:

Fields description:
- Enabled: indicates if the payment mode has to appear on the payment screen or not.
- Title/description: indicates the Title/description of the payment mode displayed to final customer.
- Logo: allows to upload a logo displayed on the payment screen.
- Merchant UID mapping (mandatory): for every country where the payment mode is enabled, you have to fill-in in the corresponding merchant_uid . Pledg provides 1 merchant_uid per country.
- Secret key: Secret key used to sign exchanges between merchant's site and Pledg. It is provided by Pledg.
- Minimum order amount to activate payment: Allows to define a minimum total order to display or not to final customer the payment mode.
- Maximum order amount to activate payment: Allows to define a maximum total order to display or not to final customer the payment mode.
- Sort order: integer to define the order to display the current payment mode.
- Allowed groups: if you specify one or more groups here, the facility will be shown only to customers belonging to these groups.
Save configuration (Top right button).
Configuration of the widget
- If the 'Enable widget on product page' option is checked, a small widget will be displayed on the product page to inform buyers about our solution.

- When the information button is clicked, a popup will appear informing the customer about how to proceed and display a payment schedule.

Troubleshooting
If the configuration does not apply, empty Magento cache:
- System > Cache management > "Flush Magento Cache".
- Wait for the notification: "The Magento cache storage has been flushed.".

- If this does not help, connect to the server using ssh, go in the ROOT folder of Magento and run the following command:
php bin/magento cache:clean
Step 4 - Test the checkout 🔦
Carry out a complete test in your environment:
- Fill your basket with items
- Proceed to payment
- Check in the SALES > ORDERS interface of the administration that your test order is present in the list.

Prestashop v1.6
Step 1 - Account creation
As a prerequisite, for every merchant / payment solution, an account ID (merchant_uid) has to be setup by Pledg integration team.
Step 1bis - Uninstallation (optional)
Before redoing the installation, a complete uninstallation of the module is necessary.
- Uninstalling the module
- Go to the module manager by clicking on "Modules and services" in the menu.
- Look for the PledgBySofinco module.
- Click on the green "Disable" button.
- Click on the submenu next to the "Enable" button and click on "Delete".
- Confirm the deletion; a notification will inform you that the "Module(s) uninstalled successfully".


⚠️ Before reinstalling the PledgBySofinco module, the Prestashop's cache must be emptied. To do this, go to "Advanced Settings" > "Performance" and click on "Empty Cache".

Step 2 - Installation
Add the module in Prestashop
- Go to "Modules and services" and click on "Add a new module".
- Select the "pledgbysofinco" archive in zip format and click on "Load module"; a notification will indicate that "The module has been downloaded".

- Install the PledgBySofinco module
- Look for the PledgBySofinco module in the list of modules.
- Click on the "install" button.

- Click on the "Continue Installation" button; a notification will indicate "Module(s) installed successfully".

Once the installation is complete, a new item "PledgBySofinco - Payments" should appear in the Prestashop menus.

Step 3 - Configuration
🔧 On your Prestashop Back Office, you can add the various PledgBySofinco payment methods.
- Go to PledgBySofinco - Payments:
- add a payment method:

- fill the information:

- Fill in the fields.
- Click on the "Save" button; a notification will say "Creation successful".
- Repeat the add operation for all your PledgBySofinco payment methods.
Description of the fields:
- Title (required): the title of the payment method; this title will appear to the user (example: "Pay in 3x").
- Activate payment: yes if you want to activate this payment method.
- Production mode: yes if you want to put this payment method into production.
- Merchant ID (required): This is the mapping between the merchant Ids and the country in which the payment method is activated.
- Secret (required): your secret key used to certify payments (communicated by Pledg).
- Minimum: minimum amount in the customer's cart, that allows them to use this payment method.
- Maximum: maximum amount till which the customer can use this payment (if you don't which to set a threshold, type 0).
- Icon: lets you upload an icon that the customers will see in front of this payment method.
- Description: the description of your payment.
- Position: order of priority to display your PledgBySofinco payment methods.
- Disabled shop: choose not to display this payment method on a specific shop
- Disabled groups: choose not to display this payment method for the customers belonging to the groups selected (the ones that you can customize in Customers>Groups)
Step 4 - Test
Carry out a complete test in your environment:
- Fill your basket with items
- Proceed to payment
- Check in the "Orders" interface of the administration that your test order is present in the list.

Prestashop from v1.7.4 to v9.x
Step 1 - Account creation
As a prerequisite, for every merchant / payment solution, an account ID (merchant_uid) has to be setup by Pledg integration team.
Step 2 - Installation
Download PledgBySofinco module for Prestashop 1.7.4 and 1.7.5
Download PledgBySofinco module for Prestashop from 1.7.6 to 9.x
Add the module in Prestashop
- Go to module manager via the menu "Modules" and click on "Load module".
- Select the "PledgBySofinco" archive in zip format; a notification will tell you that "The module has been successfully uploaded downloaded".

The module will be automatically activated and will appear in the "MORE" section of the menu.
Step 3 - Configuration
🔧 In your Prestashop admin, you can add your PledgBySofinco payment methods.
In the left menu, go to MORE > PledgBySofinco - Payments [1]. You get to the screen as shown on the below image, listing all the PledgBySofinco payment methods already set up. Click on "Add Payment" [2]

🔖 Fill in the information then click on Save:

Description of the fields:
- Title (required): the title of the means of payment; this title will appear to the user (example: "Pay in 3x").
- Activate payment: enable / disable this payment method.
- Production mode: yes if you want to put this payment method into production, no if you want to keep it in test mode for now.
- Marchant ID (mandatory): This is the mapping between the merchant Ids and the country in which the payment method is activated.
- Secret: Secret key for authentication (i.e. securing) the payments (communicated by Pledg).
- Minimum: minimum amount in the customer's cart, that allows them to use this payment method.
- Maximum: maximum amount till which the customer can use this payment (if you don't which to set a threshold, type 0).
- Icon: lets you upload an icon that the customers will see in front of this payment method.
- Description: the description of your payment.
- Position: order of priority of the selected payment method.
Configuring the widget
A widget is available on single product page and cart page. It displays the payment methods configured :
- Single product page

- Cart page

When clicking the information button, a popup will inform the customer about how to proceed, and display a payment schedule

You can enable / disable the widgets in the module configuration, by clicking on "configure" once the module is installed, or by going in Modules > Module Manager and finding the PledgBySofinco one.
For the product page widget, you can select the place where the widget will be inserted in the page:
- the product price hook (selected by default)
- the product additional info hook
- the product "after thumbs" hook

Here are the different possible locations for the product widget:

Step 4 - Test
Carry out a complete test in your environment:
- Fill your basket with items
- Proceed to payment
- Check in the "Orders" interface of the administration that your test order is present in the list.

Upgrading
To upgrade the module, you need to first uninstall it, and then go back to Step 2 - Installation
- Go to the module manager by clicking on "Modules" in the menu.
- Look for the PledgBySofinco module.
- In the left sub-menu click on "Disable" and then on "Uninstall".
- Confirm the uninstallation: a notification will inform you "Module(s) uninstalled successfully".

⚠️ Before reinstalling the PledgBySofinco module, the Prestashop's cache must be emptied. To do this, go to "Advanced Settings" > "Performance" and click on "Empty Cache".

Sylius
Supported versions
As of now, Sylius versions from 1.6 to 2.x are supported.
Step 1 - Account creation
As a prerequisite, for every merchant / payment solution, an account ID (merchant_uid) has to be setup by Pledg integration team.
Step 2 - Installation/Upgrade/Uninstallation
The installation, the upgrade and the uninstallation of the module are done via PHP Composer. Prior to execute the commands, you need to connect using SSH to the server.
Installation:
Please Follow the instructions below in the installation guide:
- Install the package
- Import routes
- Clear cache
Upgrade:
bash
composer update "pledg/sylius-payment-plugin"
php bin/console cache:clear
Uninstallation:
bash
composer remove pledg/sylius-payment-pluginStep 3 - Configure your Sylius shop
🔧 In the administration interface of Sylius :
- Go to
Configuration > Payment methods.

- Create a new payment method of type
PledgBySofinco. - Set up you payment solution

- Fill in the fields.
- Click on the "+Create" button; a notification will say "Creation successful".
- Repeat the add operation for all your PledgBySofinco payment methods.
Description of the fields:
- Code (required): it's an alias of the means of payment; this code will appear only on administration interface (example: "Pledg3x").
- Position: order of priority of the selected payment method.
- Enabled?: enable / disable this payment method.
- Channels: Enabled/disabled on the channel "Fashion web store".
- Type: Type of Payment method.
- Environnement Sandbox (staging)
- Merchant ID (required): This is the mapping between the merchant Ids and the country in which the payment method is activated.
- Secret: Secret key for authentication (i.e. securing) the payments (communicated by Pledg).
- Restricted countries: the countries in which the payment method is activated.
- Minimum Price: minimum amount in the customer's cart, that allows them to use this payment method.
- Maximum Price: maximum amount till which the customer can use this payment (if you don't which to set a threshold, type 0).
- Name: The title of payment method that will appear to the client.
- Description: the description of your payment method.
Woocommerce
Step 1 - Account creation
As a prerequisite, for every merchant / payment solution, an account ID (merchant_uid) has to be setup by Pledg integration team.
Step 2 - Uninstallation (optional)
Before redoing the installation, a complete uninstallation of the module is necessary.
Save your settings: before uninstalling the module, we recommend that you save your settings.
- Go to WooCommerce > Settings and click on the "Payments" tab and copy your identifiers (
merchant_uid) for each payment method.
- Go to WooCommerce > Settings and click on the "Payments" tab and copy your identifiers (
Uninstall the module
- Go to the module manager by clicking on Plugins > Installed Plugins in the menu.
- Look for the PledgBySofinco module.
- Click on "Desactivate" in blue.
- Click on "Delete" in red.
- Confirm the uninstallation; a notification will inform you that the "WooCommerce PledgBySofinco was successfully deleted".

Step 3 - Installation
- Download PledgBySofinco WooCommerce module
Take the archive as is, then:
- Add the module in WordPress
- Go to module manager via the menu "Plugins > Add new" and click on "Load module".
- Click on "Upload Plugin".
- Select the archive you just retrieved in zip format and click on the "Install Now" button.

- Then click on the "Activate Plugin" button; a notification will say "Plugin activated".

Step 4 - Configuration of the payment methods
🔧 On your Woocommerce Back Office, you can add the different PledgBySofinco payment methods.
To do so, go to Woocommerce > Setting > Payments where you will find a list of the PledgBySofinco payment methods that you can set up.

For each of your account identifiers (merchant_uid), configure a PledgBySofinco method. The ones you have configured and activated will appear in the payment methods available to the customer.
🔖 Click on the "Manage" button and complete the information, then click one on the "Save changes" button; a notification will inform you that "Your settings have been saved".

Description of the fields:
- Enable/Disable: yes if you want to activate this payment method.
- Development/Production mode: yes if you want to put this payment method into production.
- Merchant ID [Required]: for every country where the payment mode is enabled, you have to fill-in in the corresponding merchant_uid . Pledg provides 1 merchant_uid per country.
- Secret Key: Secret key for authenticating (i.e. securing) of the payments (communicated by Pledg).
- Title: Language for which you wish to set the means of payment title.
- Title ([Language you've selected just above]): the title of the means of payment for the selected language; this title will appear to the user (example: "Pay in 3x"). [Required]
- Description: Language for which you wish to set the the means of payment's description.
- Description ([Language you've selected just above]): the description of your payment method in the selected language.
- Minimum amount: minimum amount from which the payment method will be offered the customer.
- Maximum amount: maximum amount till which the payment method will be offered the customer (set "0" if you don't wish any threshold).
⚠️ The maximum number of PledgBySofinco payment methods is 6.
Step 5 - Configuration of the widget
You can also configure the display mode of our widget. Go to Settings > PledgBySofinco.

- If "Enable product widget" is checked, a little widget on the product page will inform buyers about our solution.

- If "Enable cart widget" is checked, a little widget on the cart page will inform buyers about our solution.

- The last option will enable the automatic selection of a PledgBySofinco payment method on the checkout page if the buyer has already click on the widget, and thought seems interested in the solution
Step 6 - CSS (optional)
If the size of the icons in front of your PledgBySofinco payment methods is too big, add a css block of code following this process:
- Click on "Appearance" in the left menu, then "Customise":

- On the newly appeared page, a new menu is displayed on the left, click on "additional CSS":

Copy / Paste this block of code [1]:
ul.payment_methods li img { vertical-align: middle; margin: -2px 0 0 .5em; padding: 0; position: relative; box-shadow: none; max-width: 23px; }
Then click on "Publish" [2]:

Step 7 - Test
Carry out a complete test in your environment:
- Fill your basket with items
- Proceed to payment
- Check in the "WooCommerce > Orders" interface of the administration that your test order is present in the list.

For information
If an error occurs during the PledgBySofinco payment process of a customer, you will find informations about it (such as the error status) on the order page, in the notes section : 
Shopify
App link
Step 1 - Add Application
- Login with your Shopify account and Click on "Add App".

Step 2 - Install Application
- Connect your shopify store and click on "install app" .

Step 3 - Payment Settings
- Once the application is installed, you will be redirected to the payment settings. Complete the settings with the informations communicated by PledgBySofinco.

Description of the fields :
- Company uid/Merchant uid: The key to identify the payment facility
- Secret key : Secret key for authenticating and securing the payments
- Dashboard Username : E-mail to connect to PledgBySofinco's Dashboard
- Dashboard Password : password to connect to PledgBySofinco's Dashboard
NB : In case the merchant is on Transfer mode, it is very important to use the same dashboard Username/Password on Staging and Production environments. It is needed for authentification on refund process.
- Save your settings.
Step 4 - Activate App
- You will be redirected to the payment settings of your sotre. If you are working on a test environment, enable test mode
- Click on "Activate PledgBySofinco"

Step 5 - Checkout settings
Go to Checkout and accounts and make sure you select
- "Email" as Customer contact method to check out.
- Require "first and last name" from customer information

Step 6 - Testing
- Now you can go to the storefront, fill your Cart with an item and pass to the checkout

Select Payment with "Pay later or in installment", Click on "review order" then "pay now "
Select your payment method and "Submit"

As a required information you will first be asked to fill your phone number. Click then on "Submit"
Fill your credit card informations and submit your payment
The payment is completed
Check order in the Backoffice.

Step 7 - Refund on Shopify
- If merchant is in Transfer mode (bank wire transfer), refund of PledgBySofinco's order can be issued directly from Shopify Backoffice.
- If merchant is in Back mode (vcards usage), refund of PledgBySofinco's order has to be issued directly from Merchant's PSP Backoffice.

Joomla
Step 1 - Installation
Download PledgBySofinco module
Take the archive as is, then:
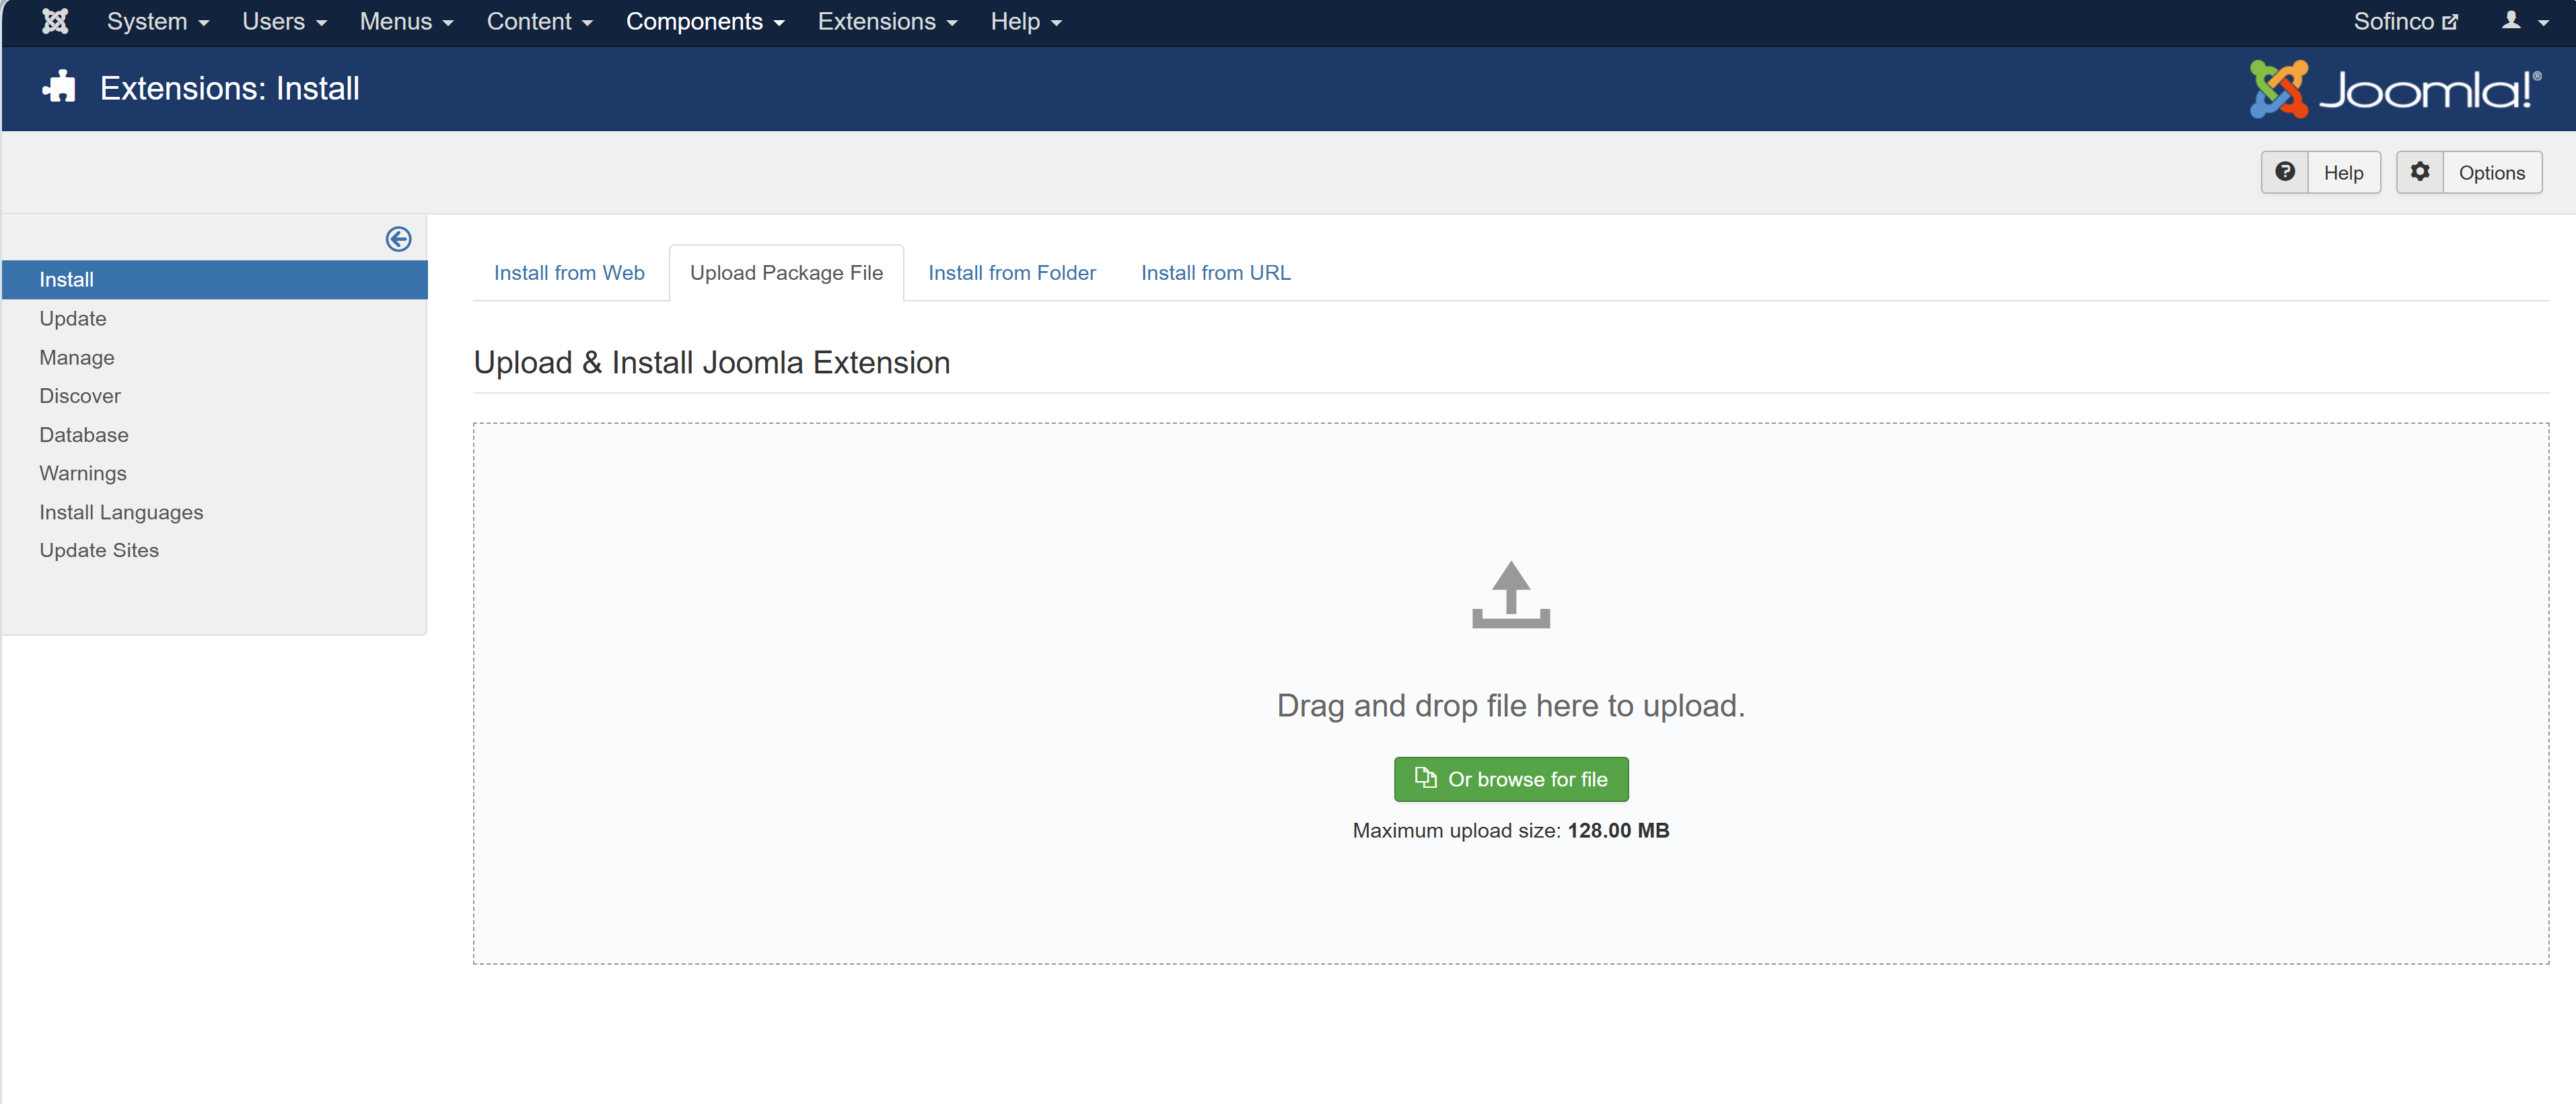
Go to "Extensions" > Manage > "Install" > "Upload Package file"
Use "Drag and drop" or "browse file" to upload the Downloaded file of PledgBySofinco
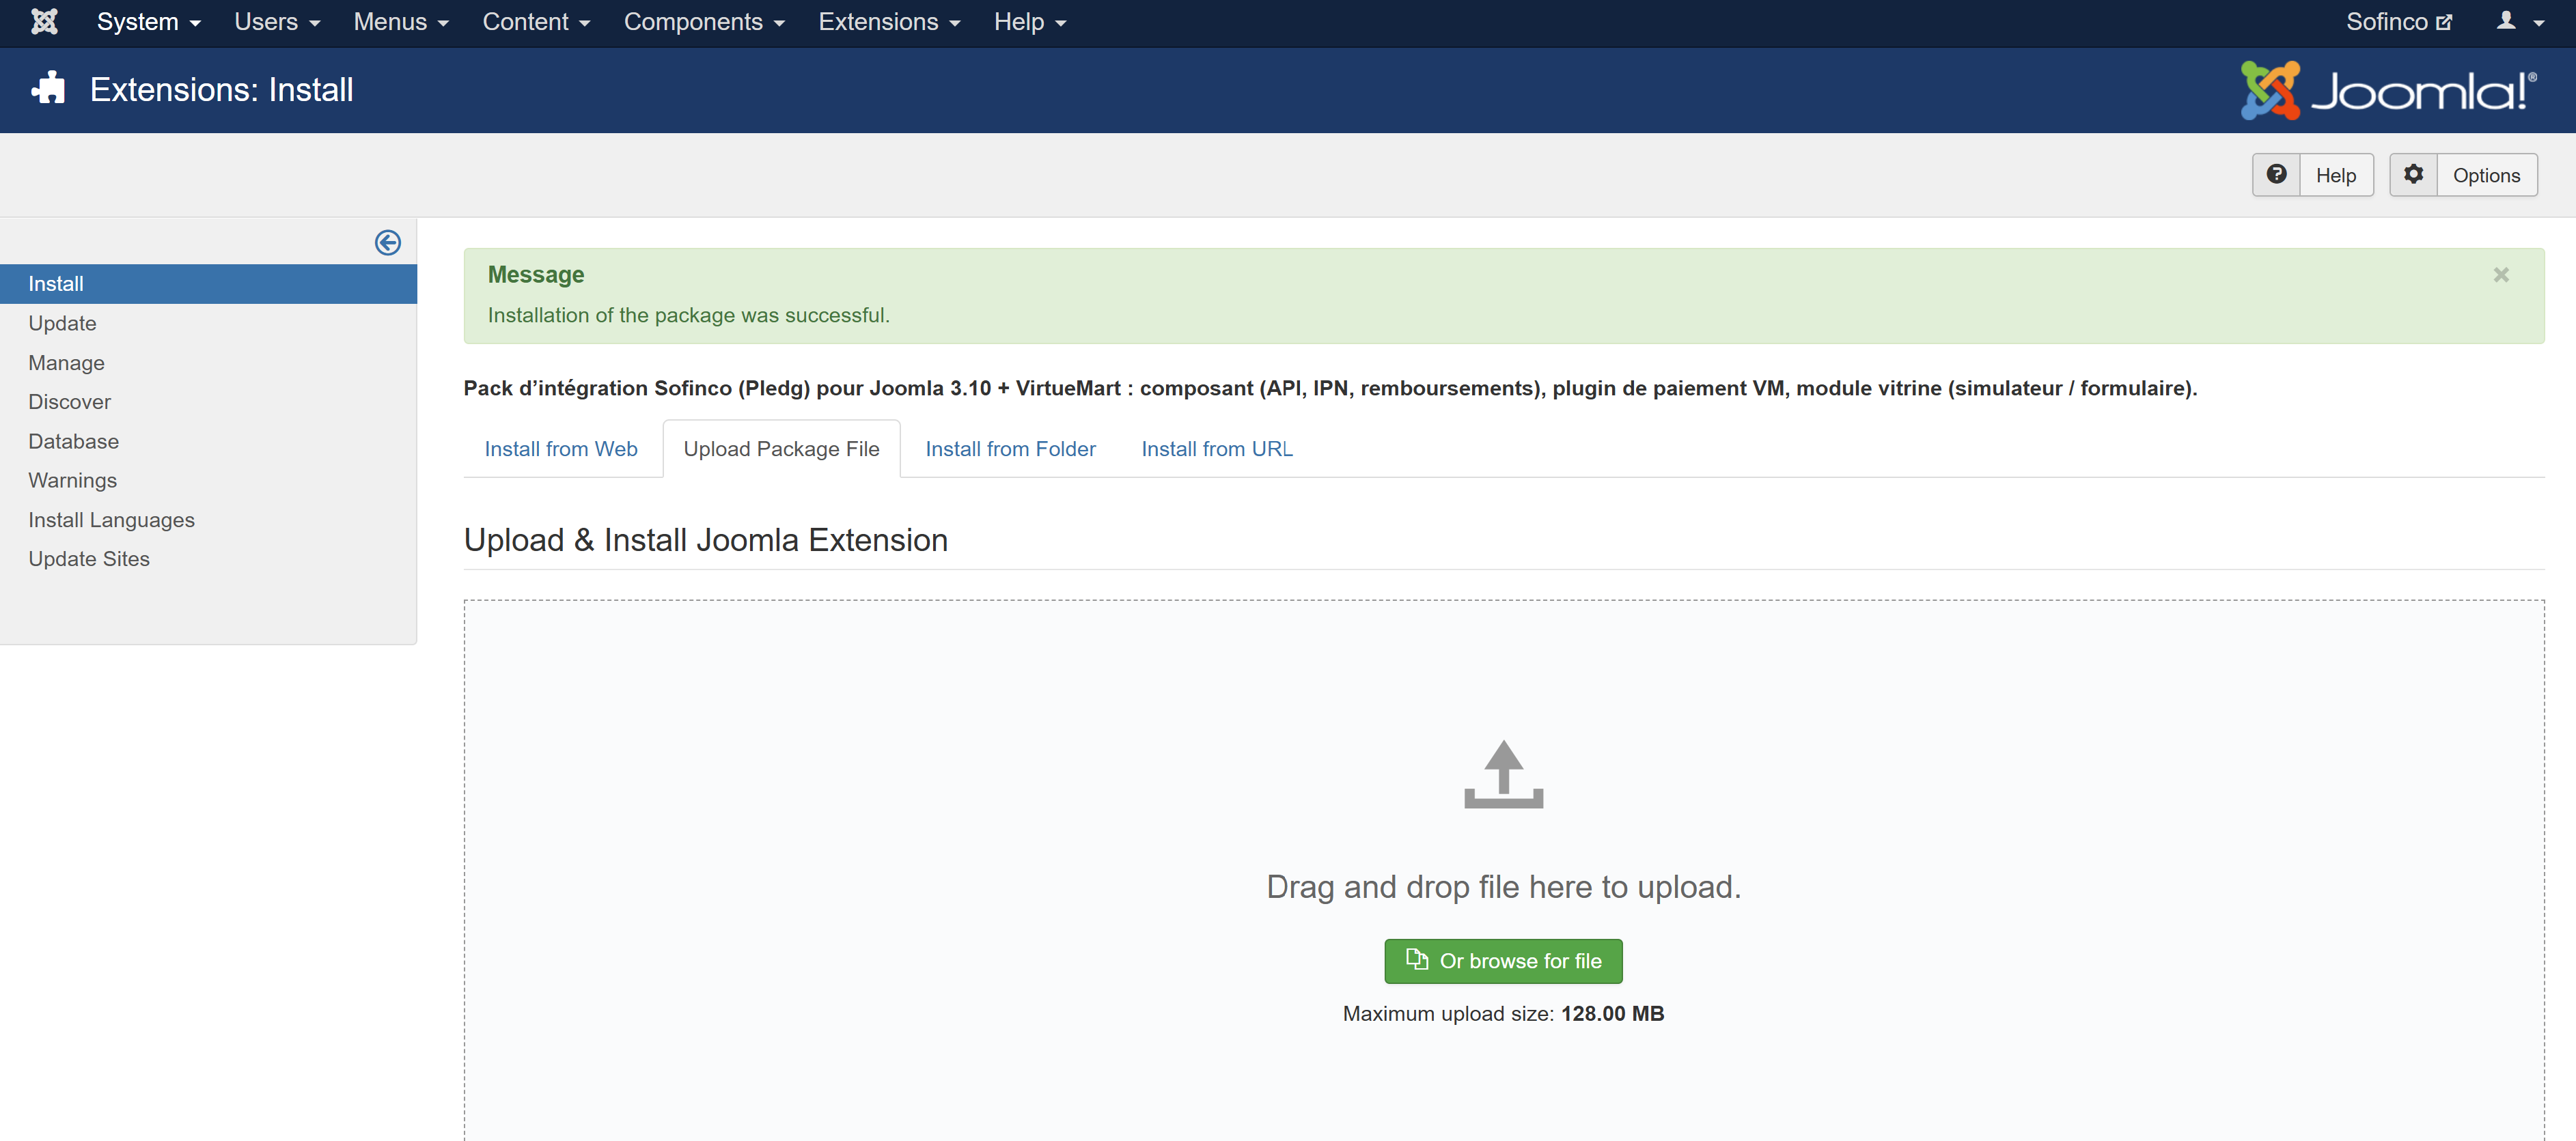
- Once the file is uploaded, a message will appear to confirm the installation.
Step 2 - Configuration
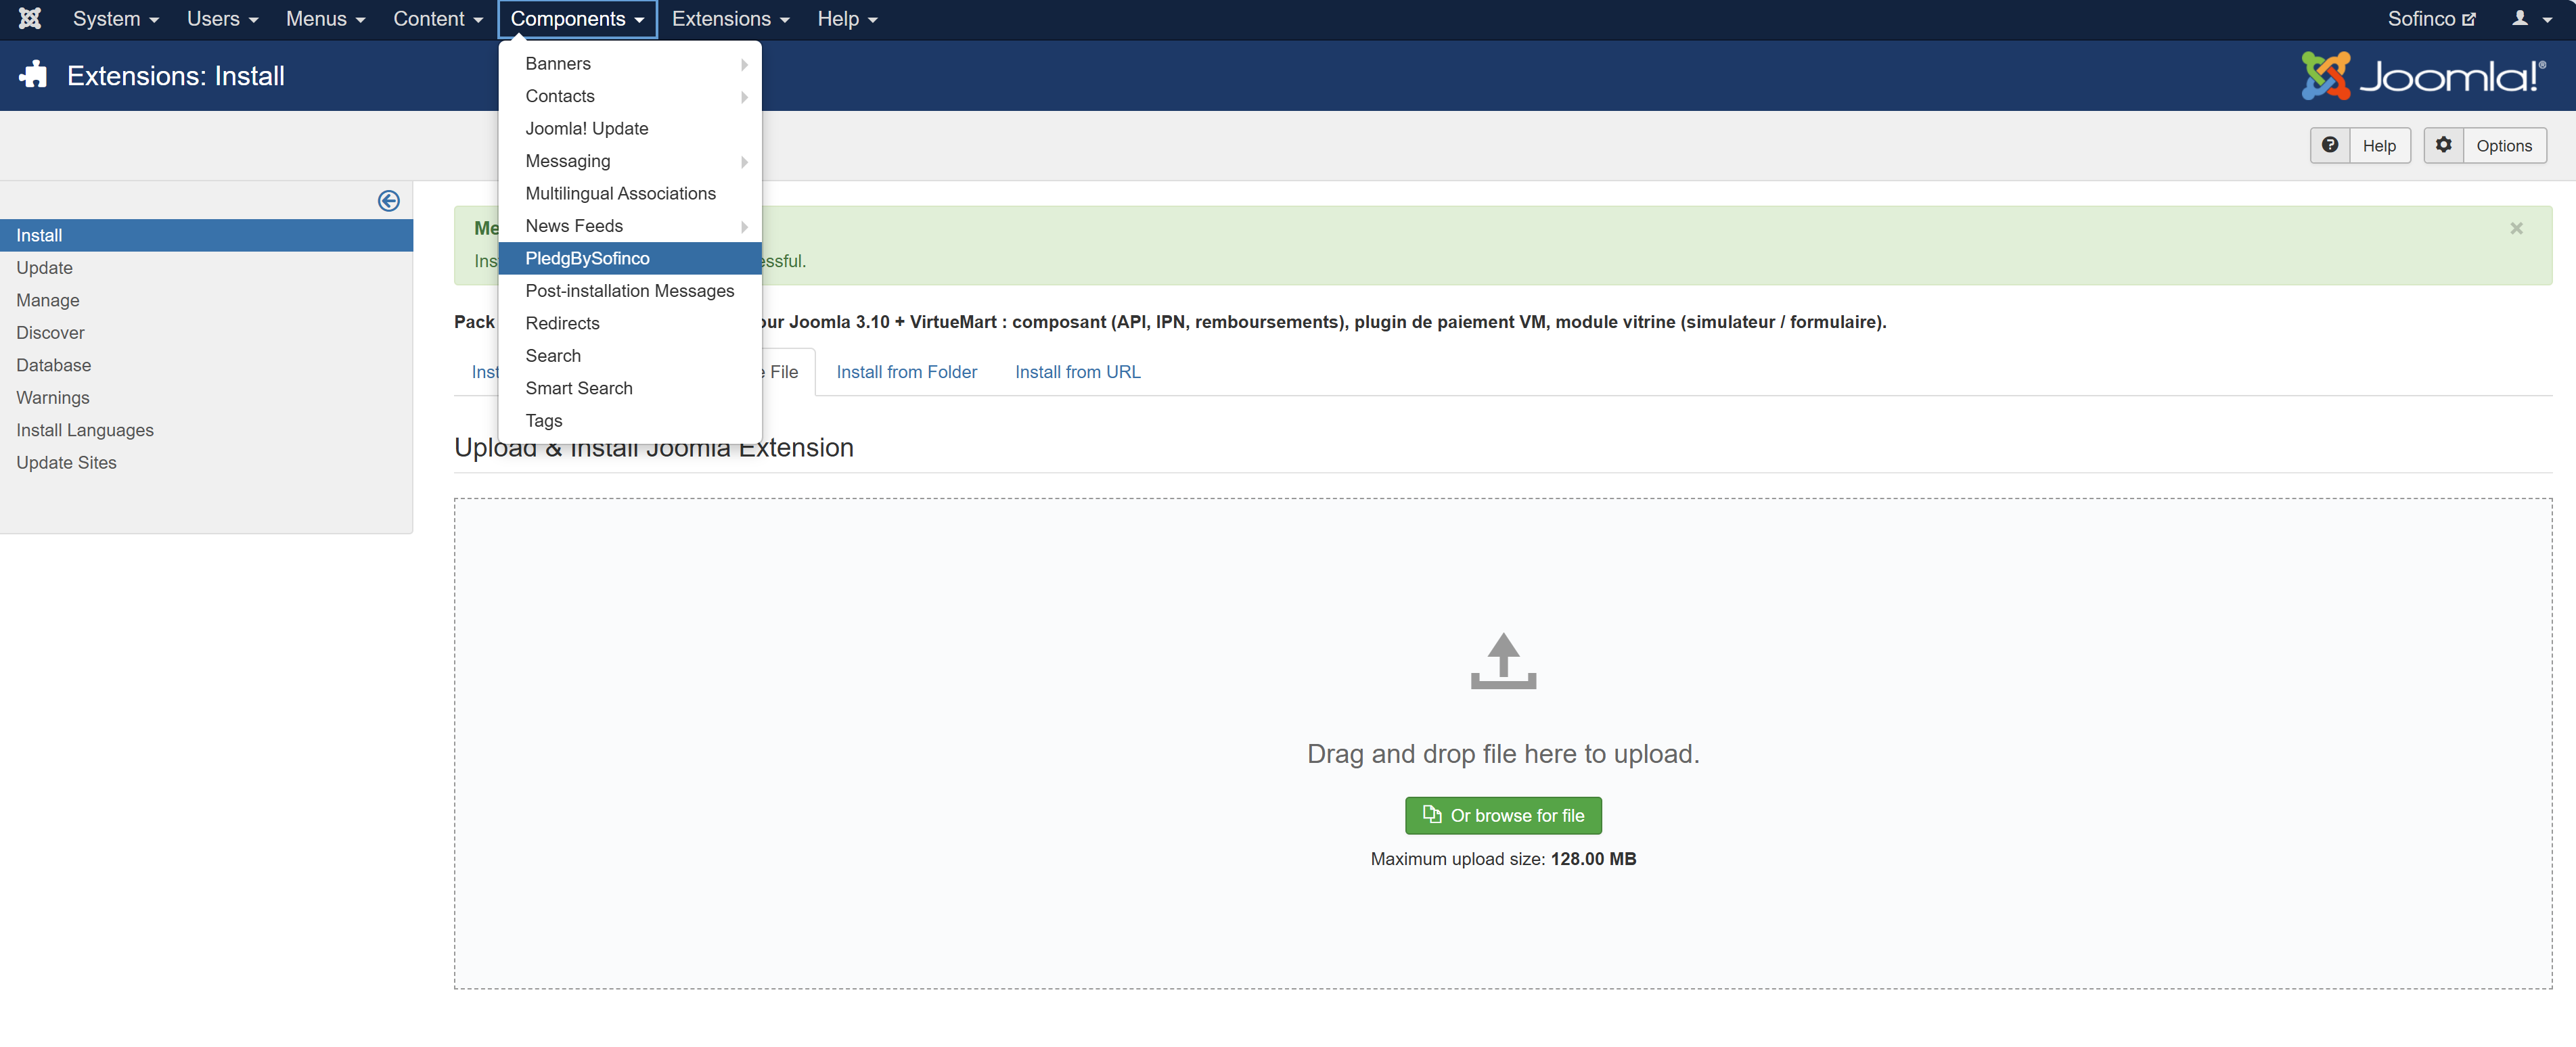
Go to "Components" and select "PledgBySofinco"
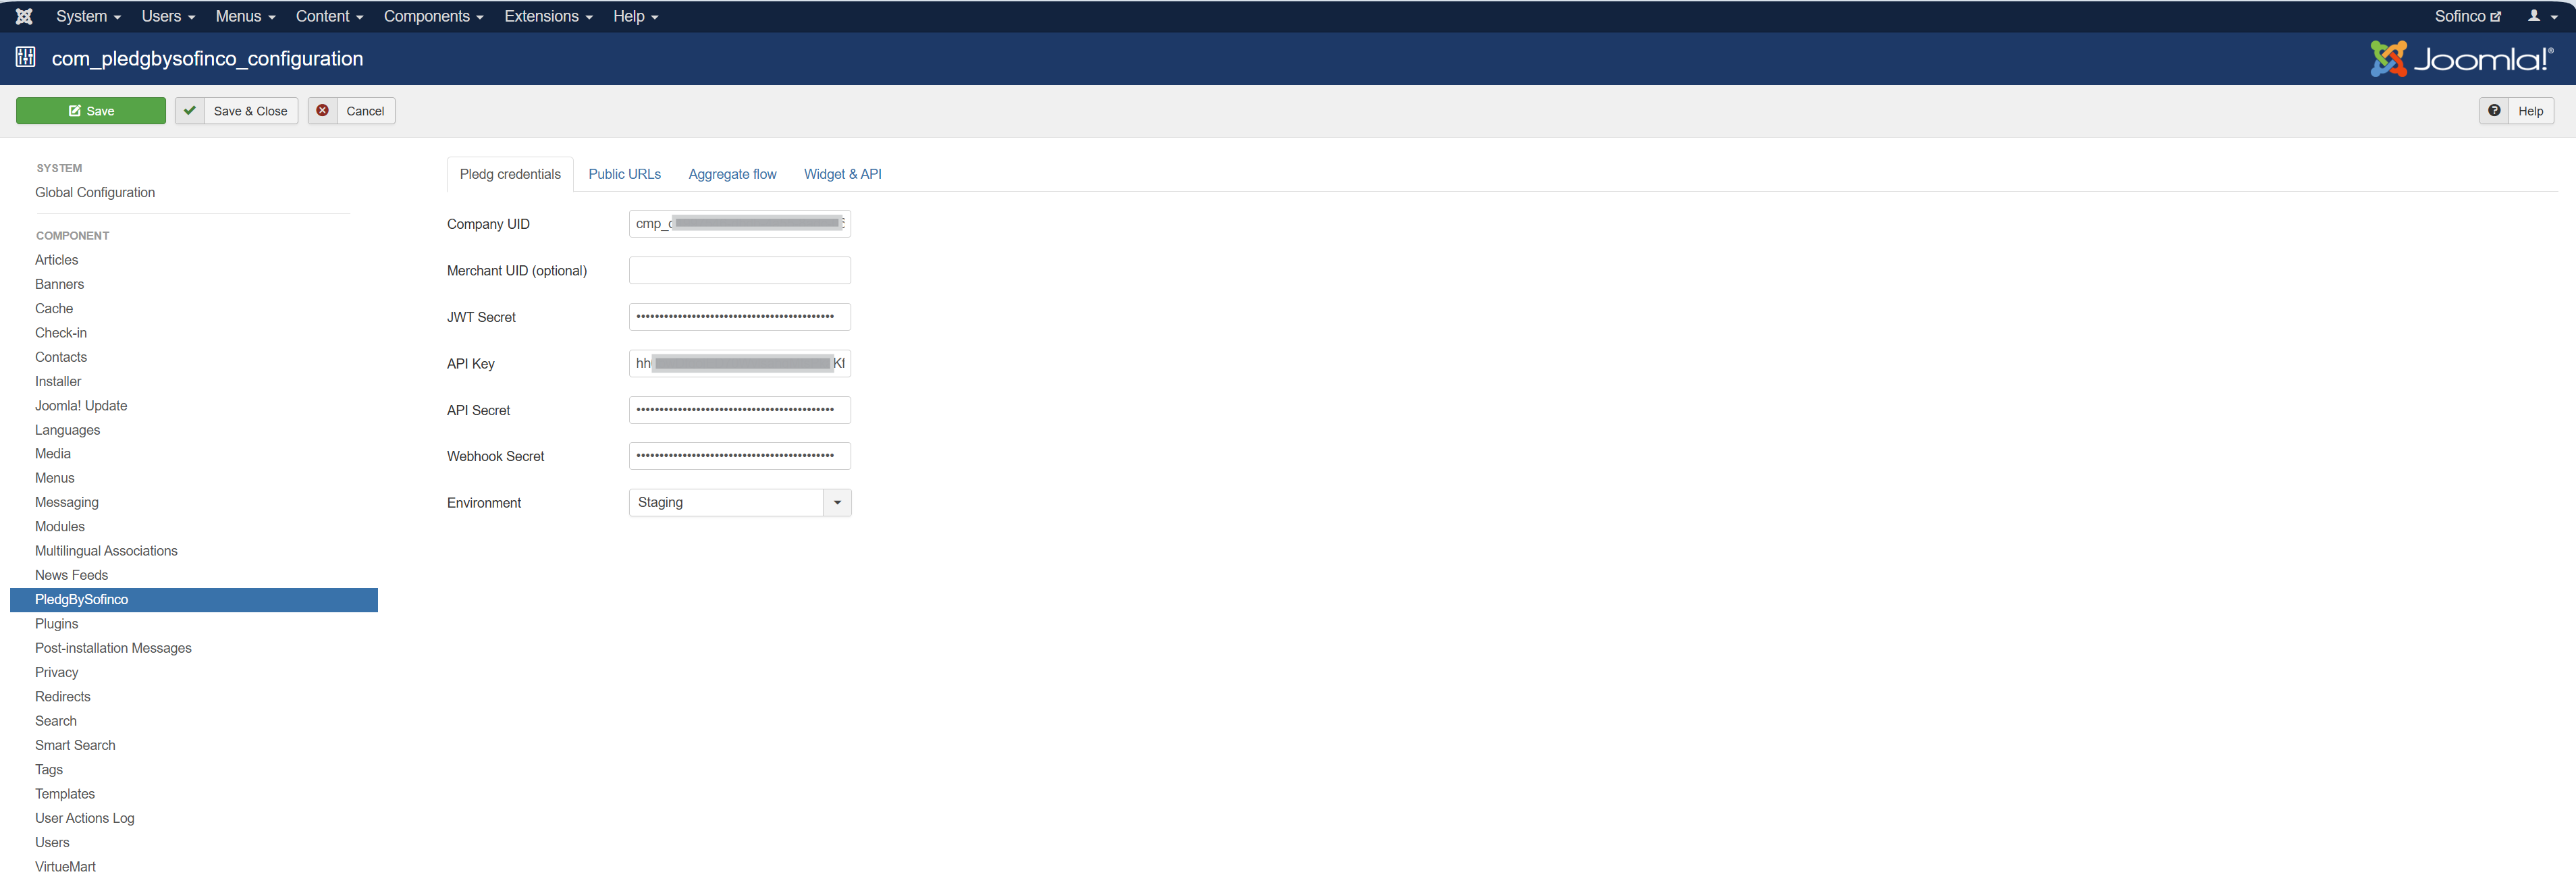
Fill the fields of "Pledg Credentials" with the informations communicated by Pledg.
Change the Environment setting to "Production" to go live and "Staging" to test.
Go to "widget & API" and fill the "max_amount" and the "min_amount" of product widget
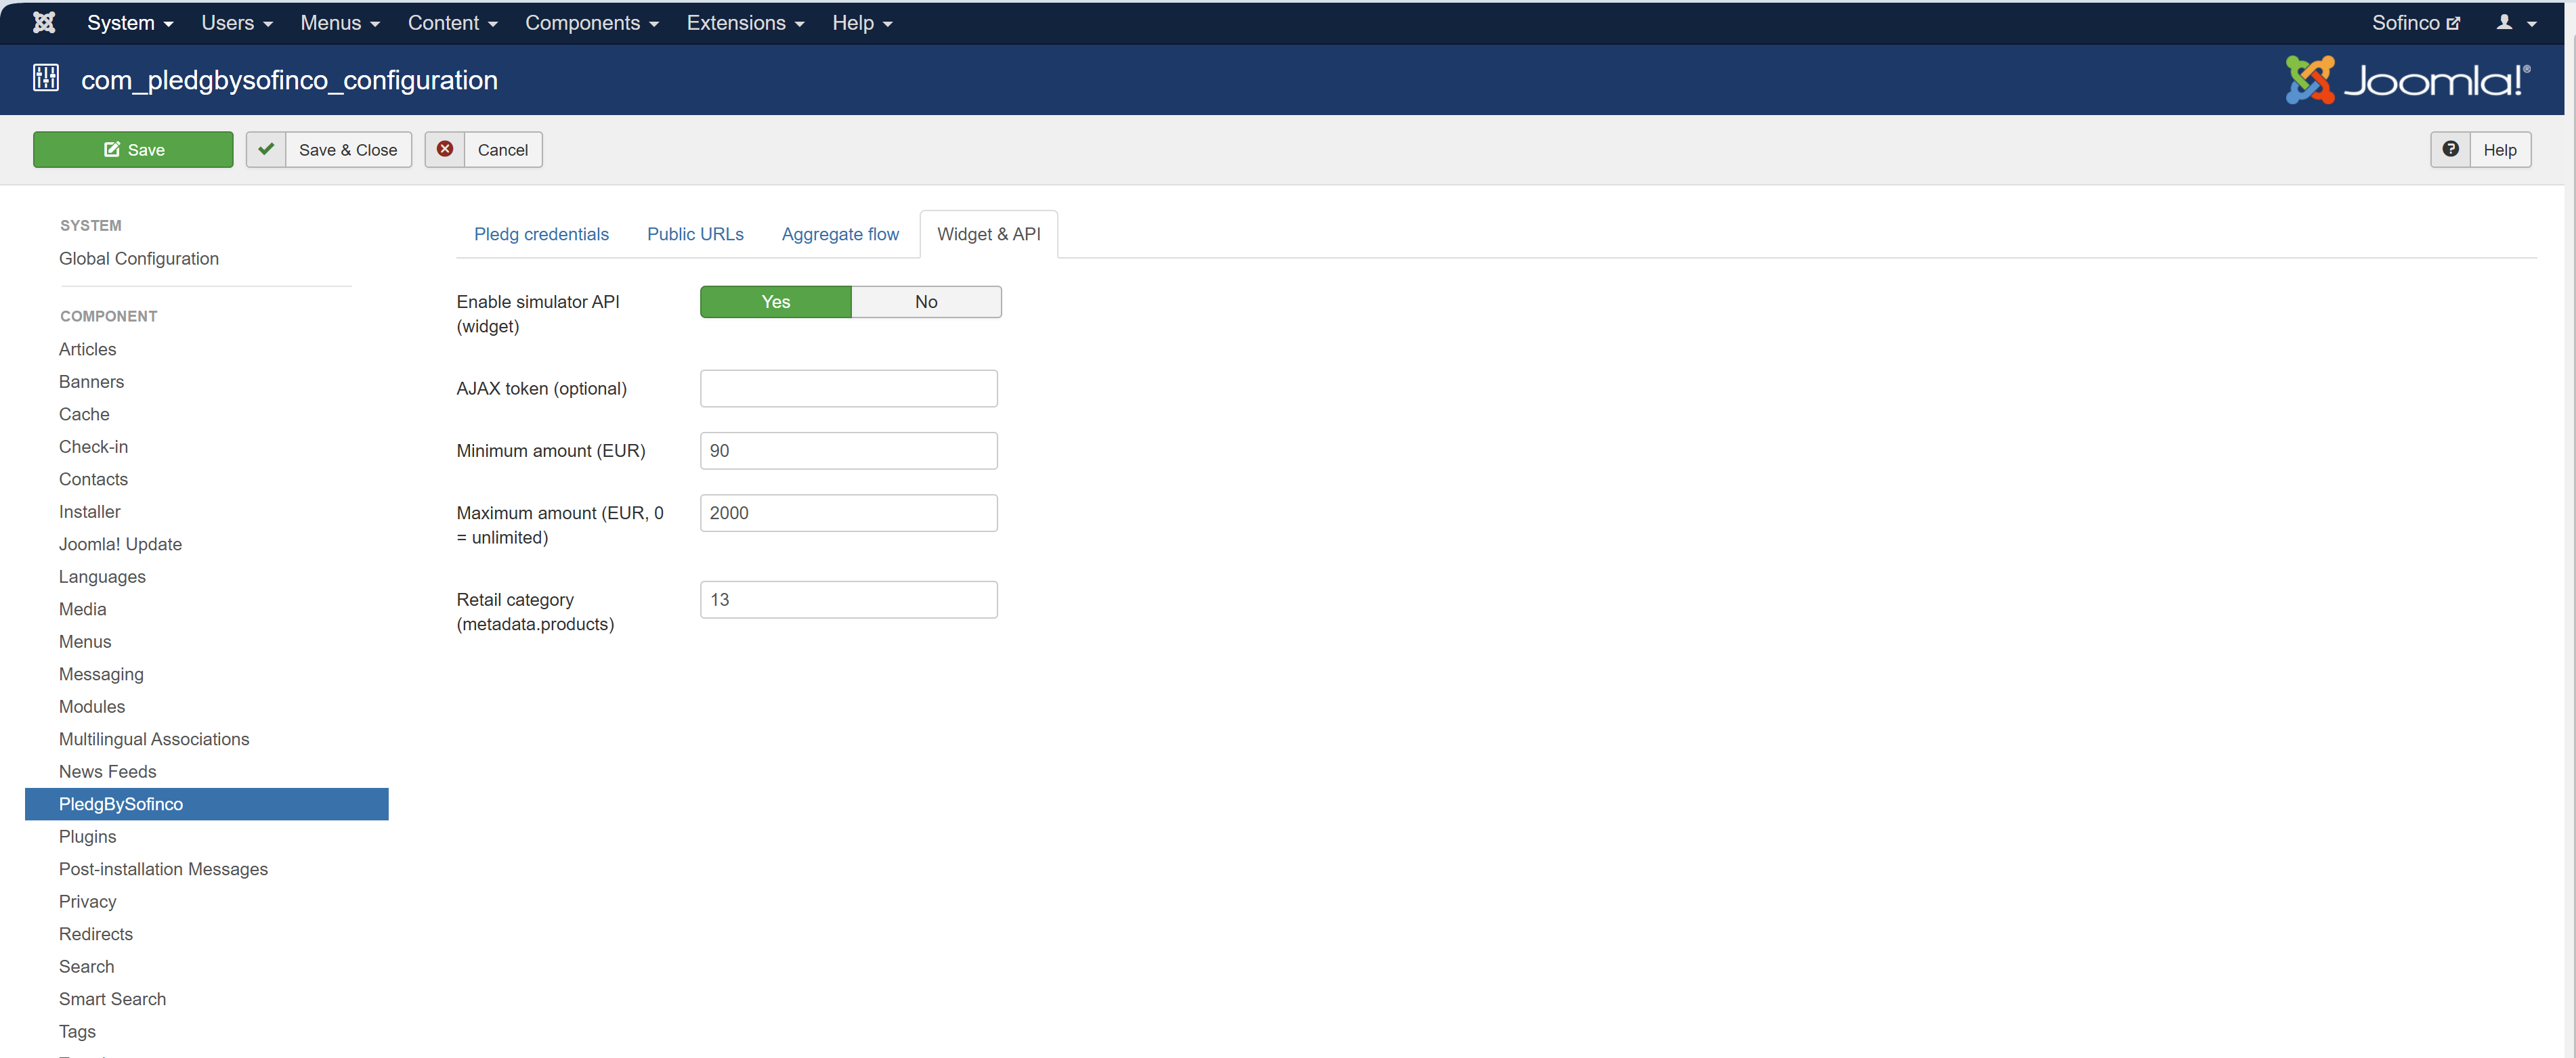
Keep the other setting by Default (Enable simulator API (widget) = enabled)
Save and close
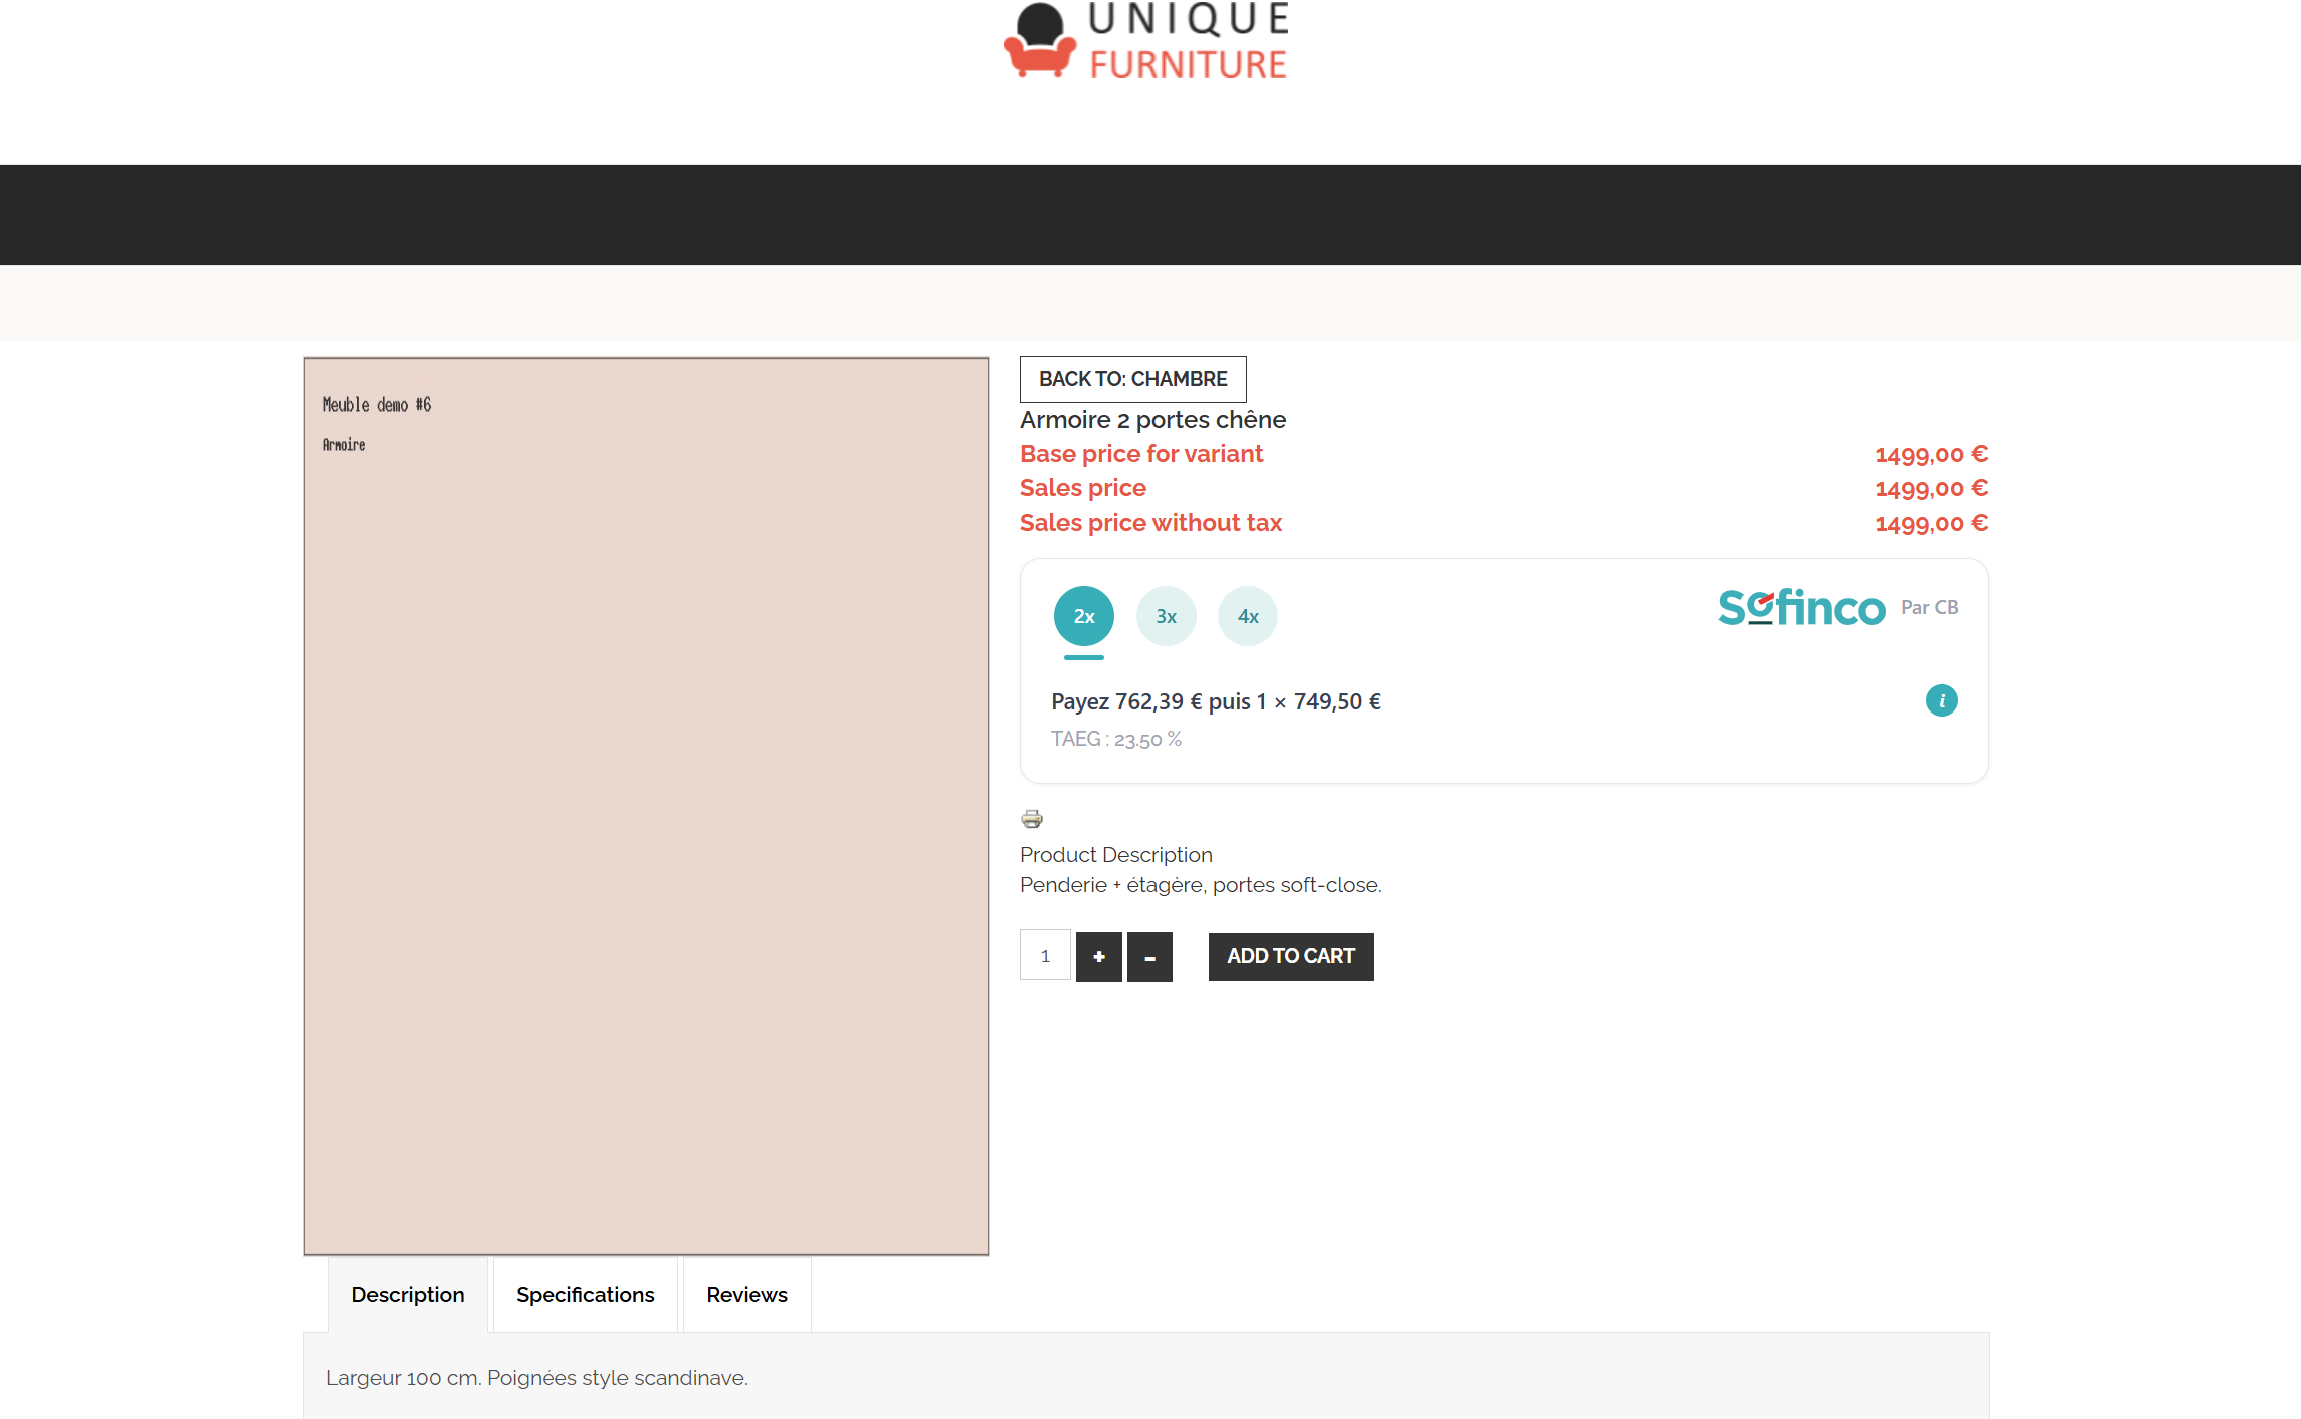
Verify the widget product on the product page
Step 3 - Configuration of Payment method (VirtueMart Component)
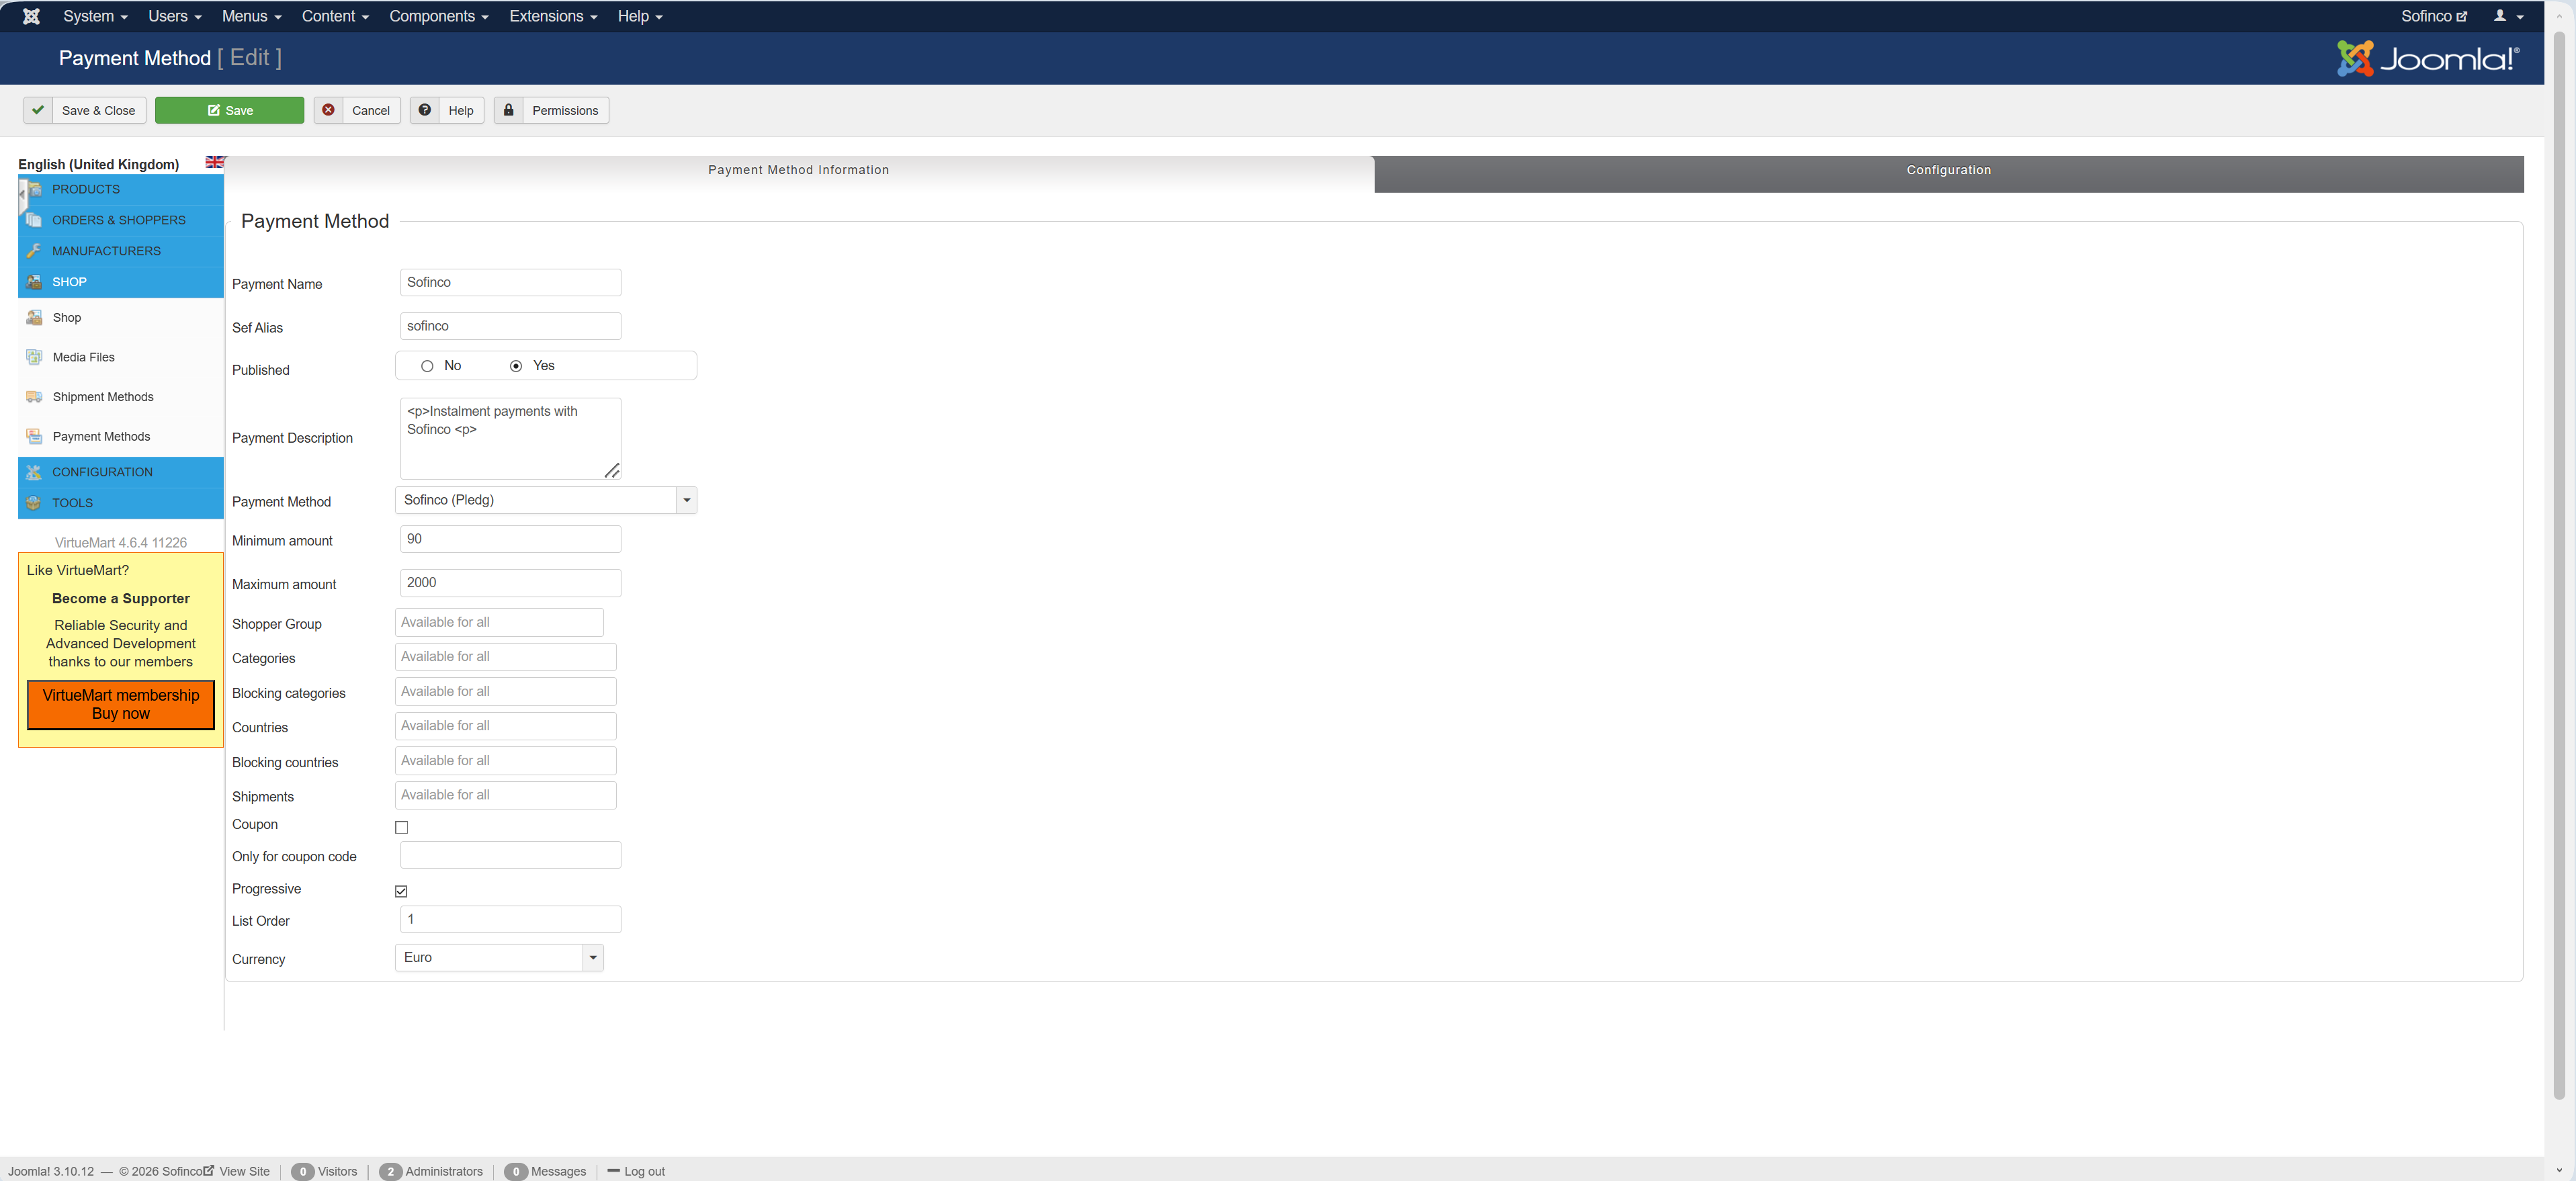
Go to "Components" > select "VirtueMart" > "Shop" > "Payment methods" and Edit "Sofinco"
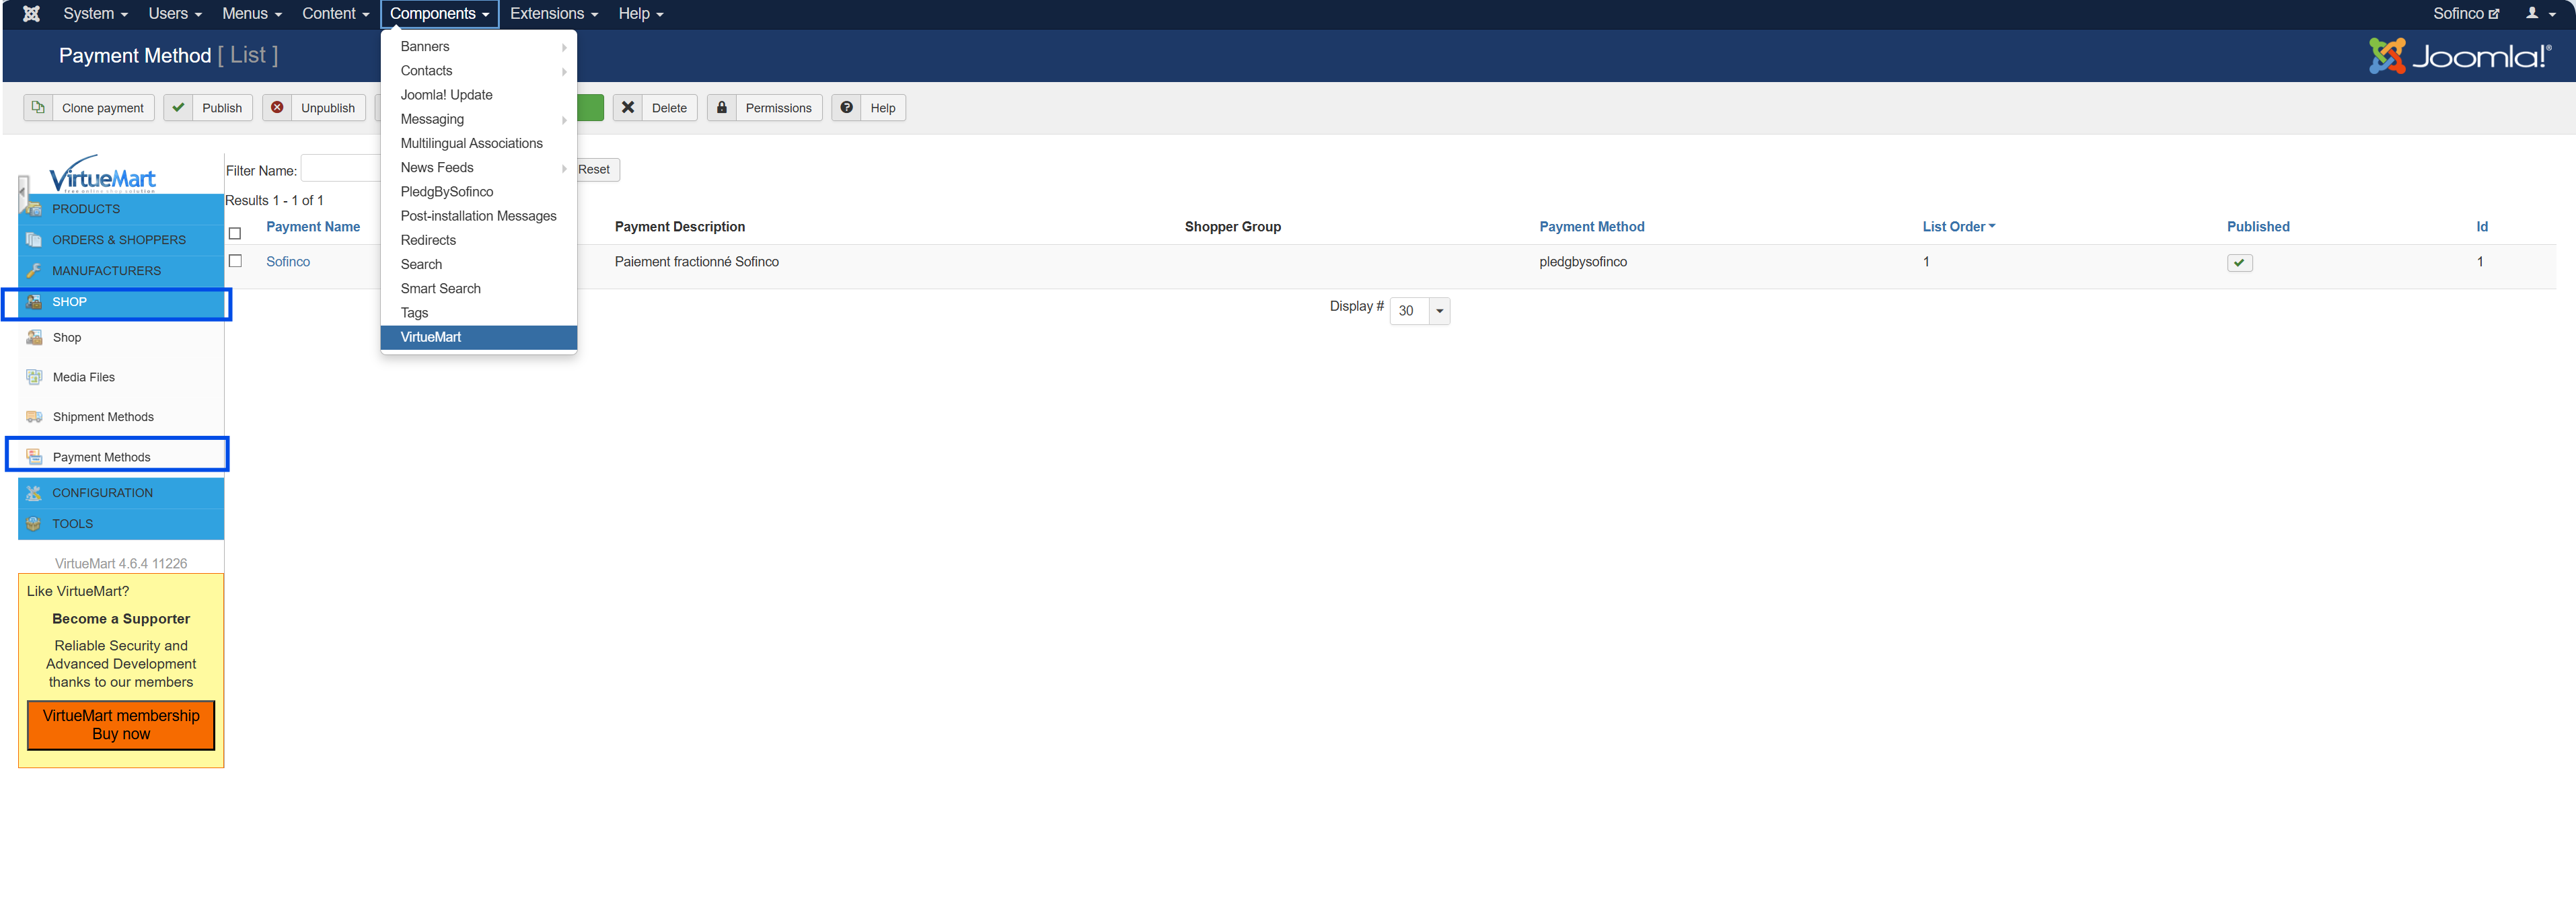
Set "Published" to "yes"
Add payment description
Set the "minimum amount" and "maximum amount"
Save and close
Step 4 - Publish Module
- Go to "Extensions" > "Modules"
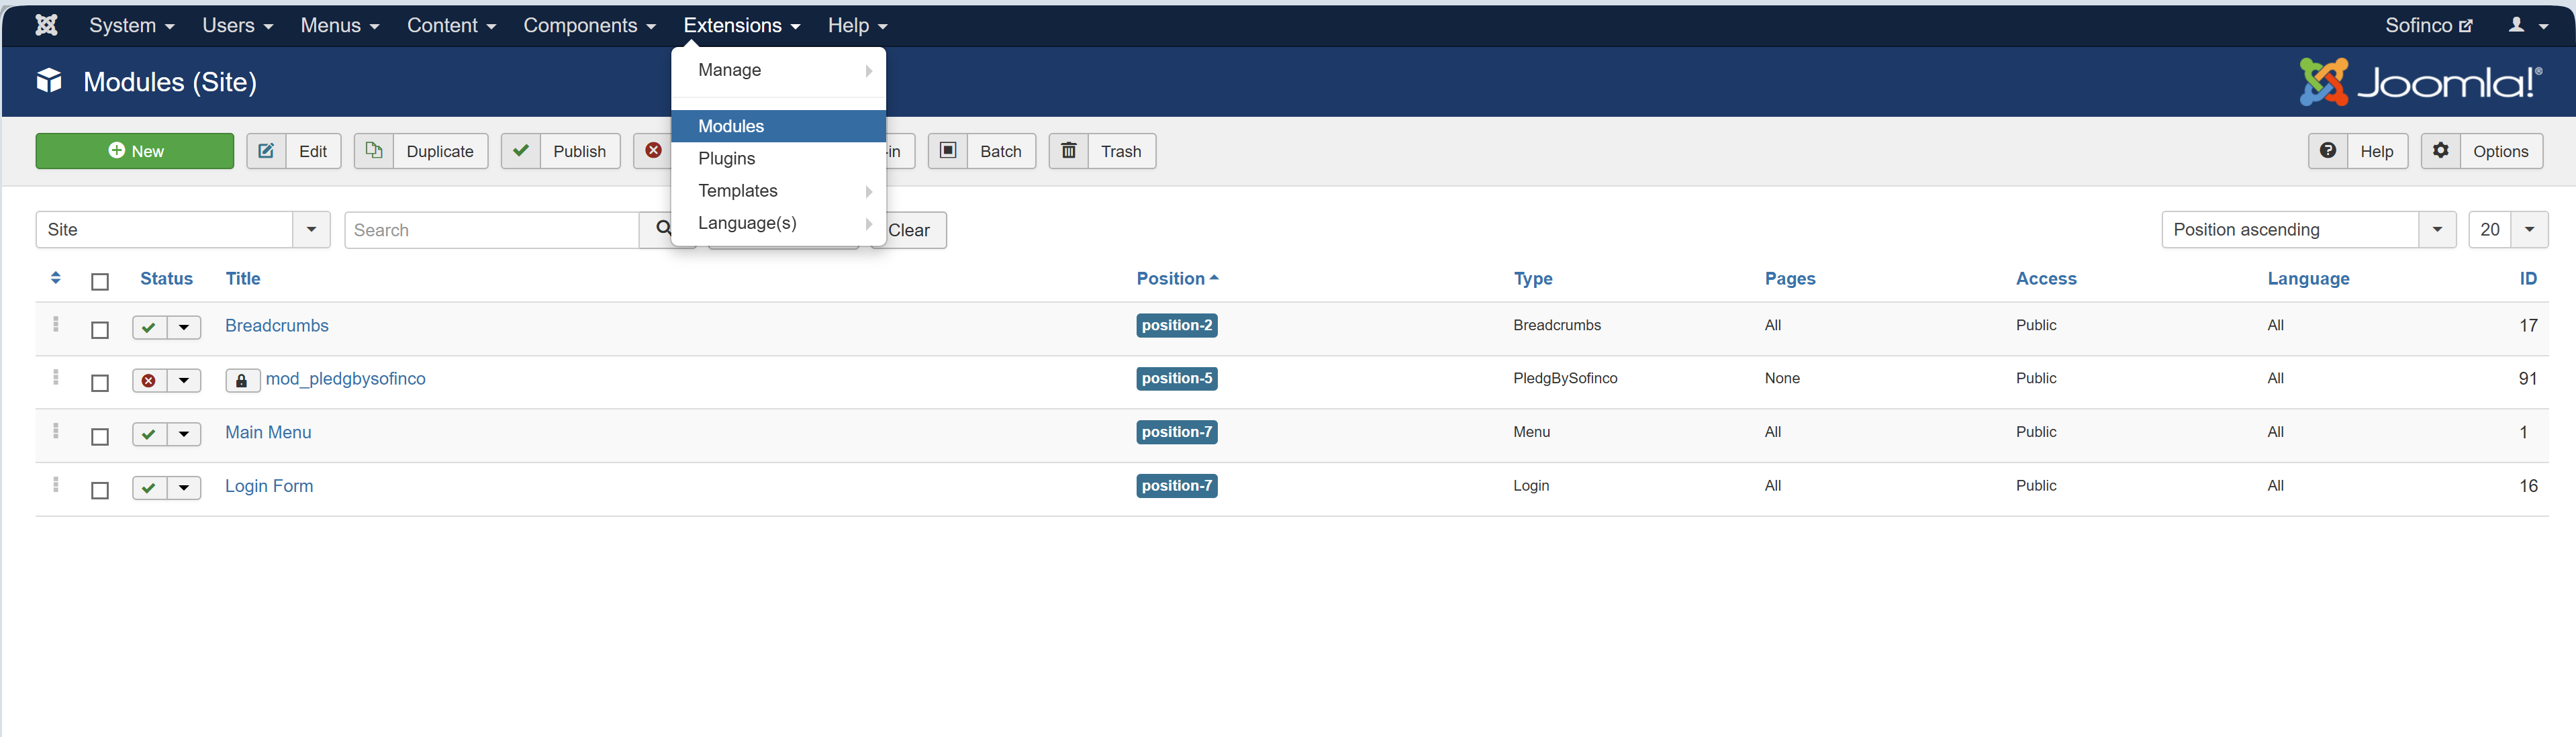
Edit "mod_pledgbysofinco"
Set the "position" to rank the payment method
Set the "Status" to "Published"
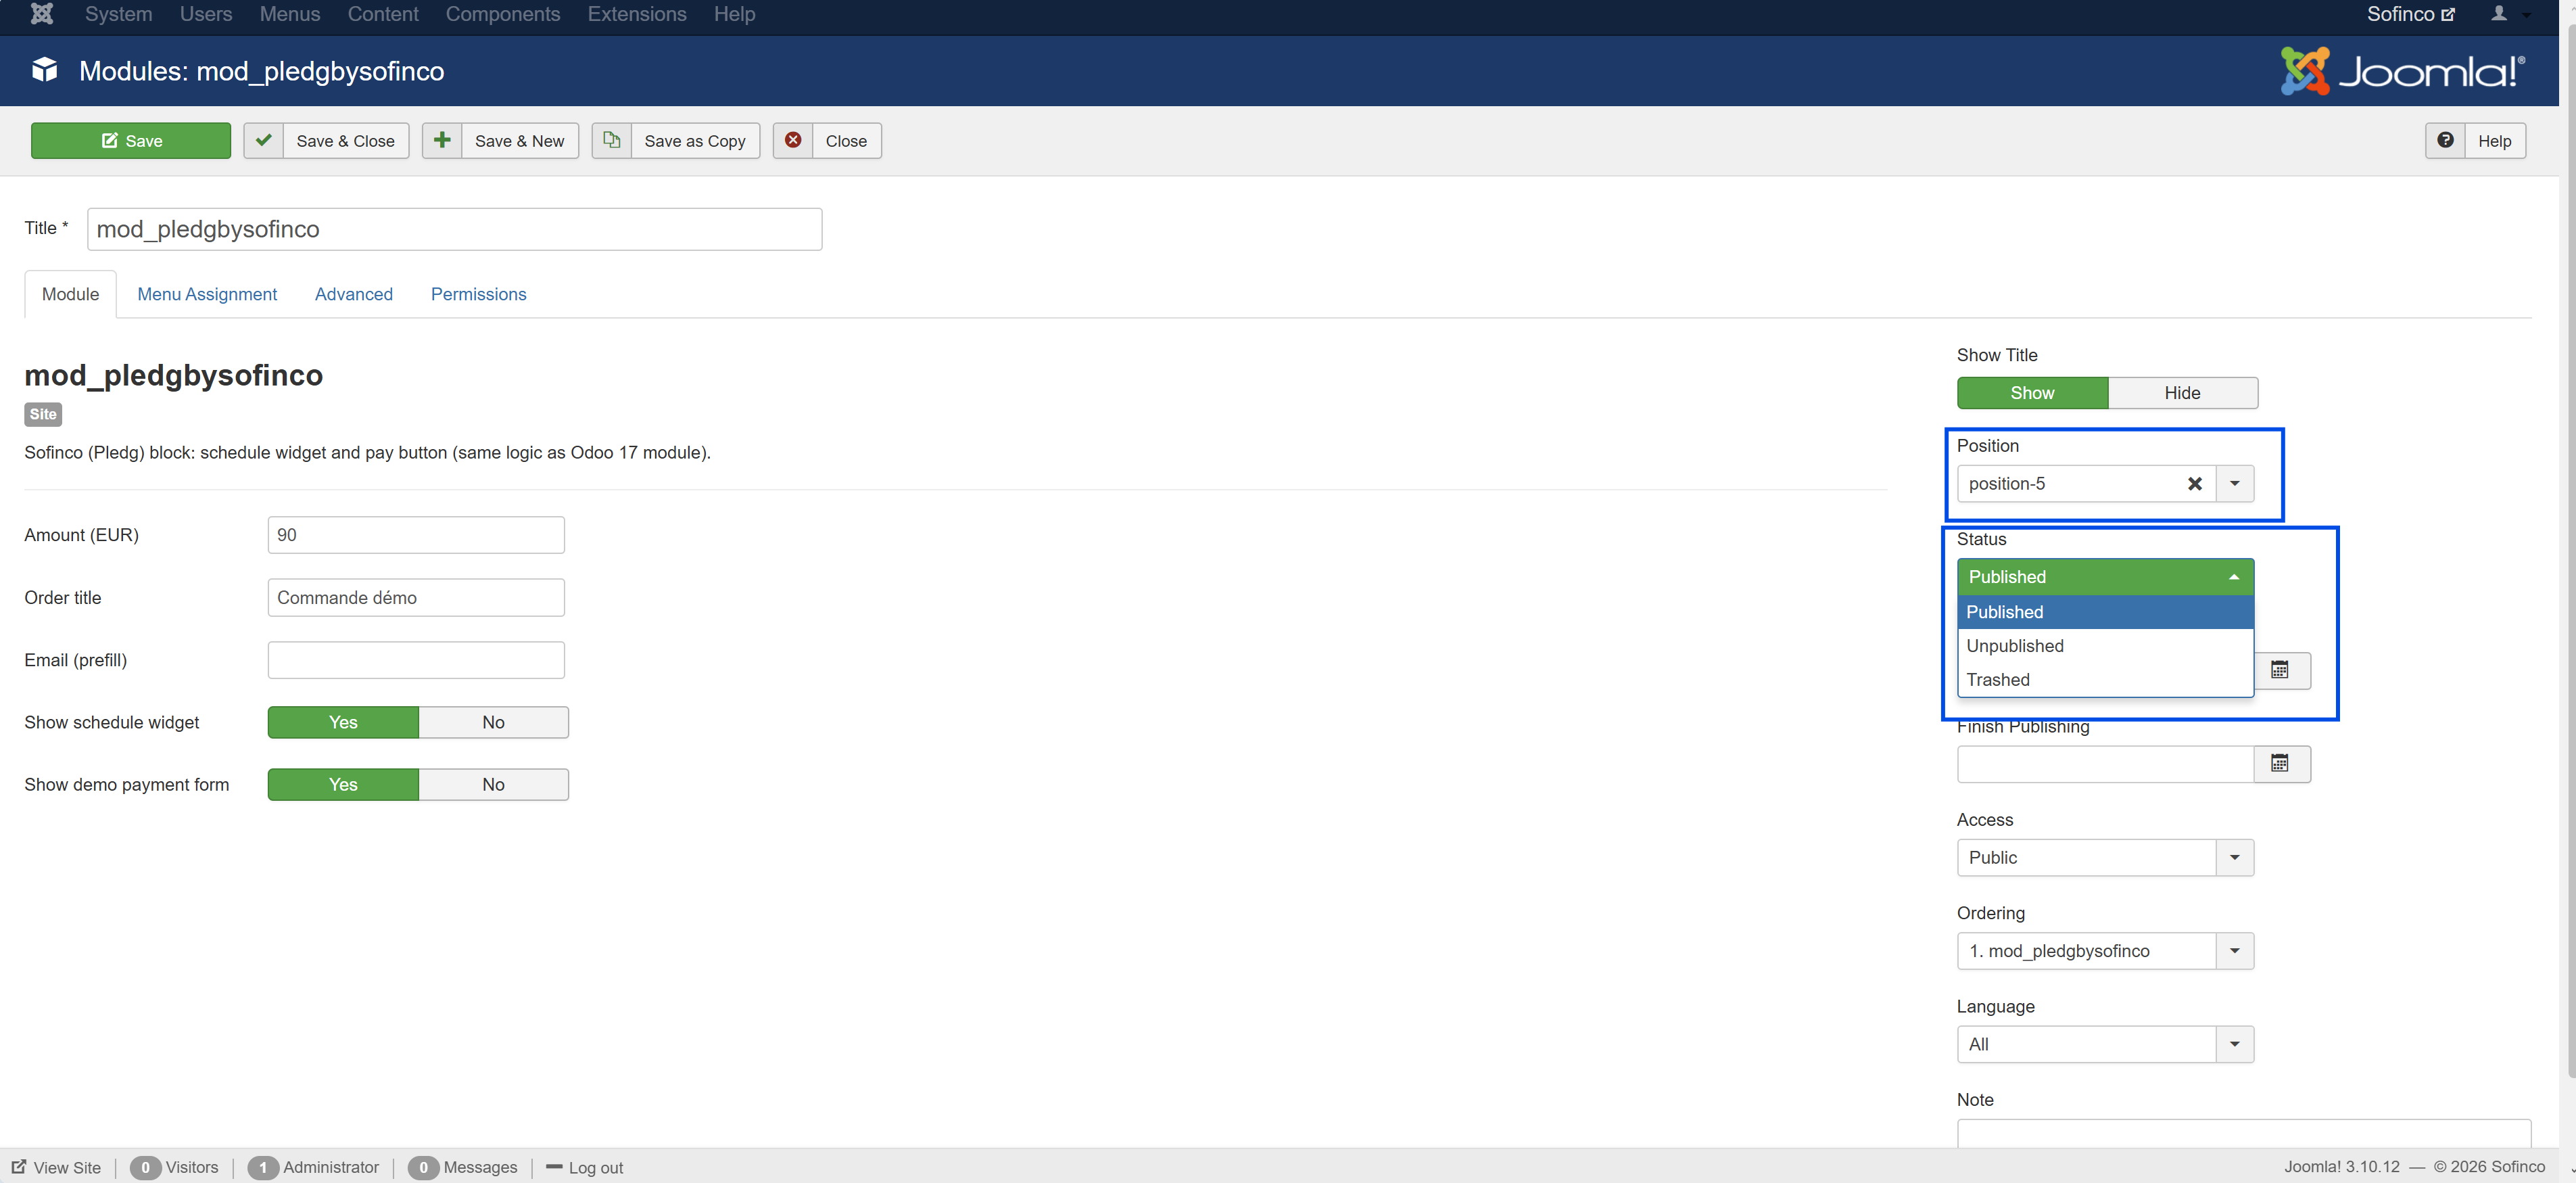
- Save and close
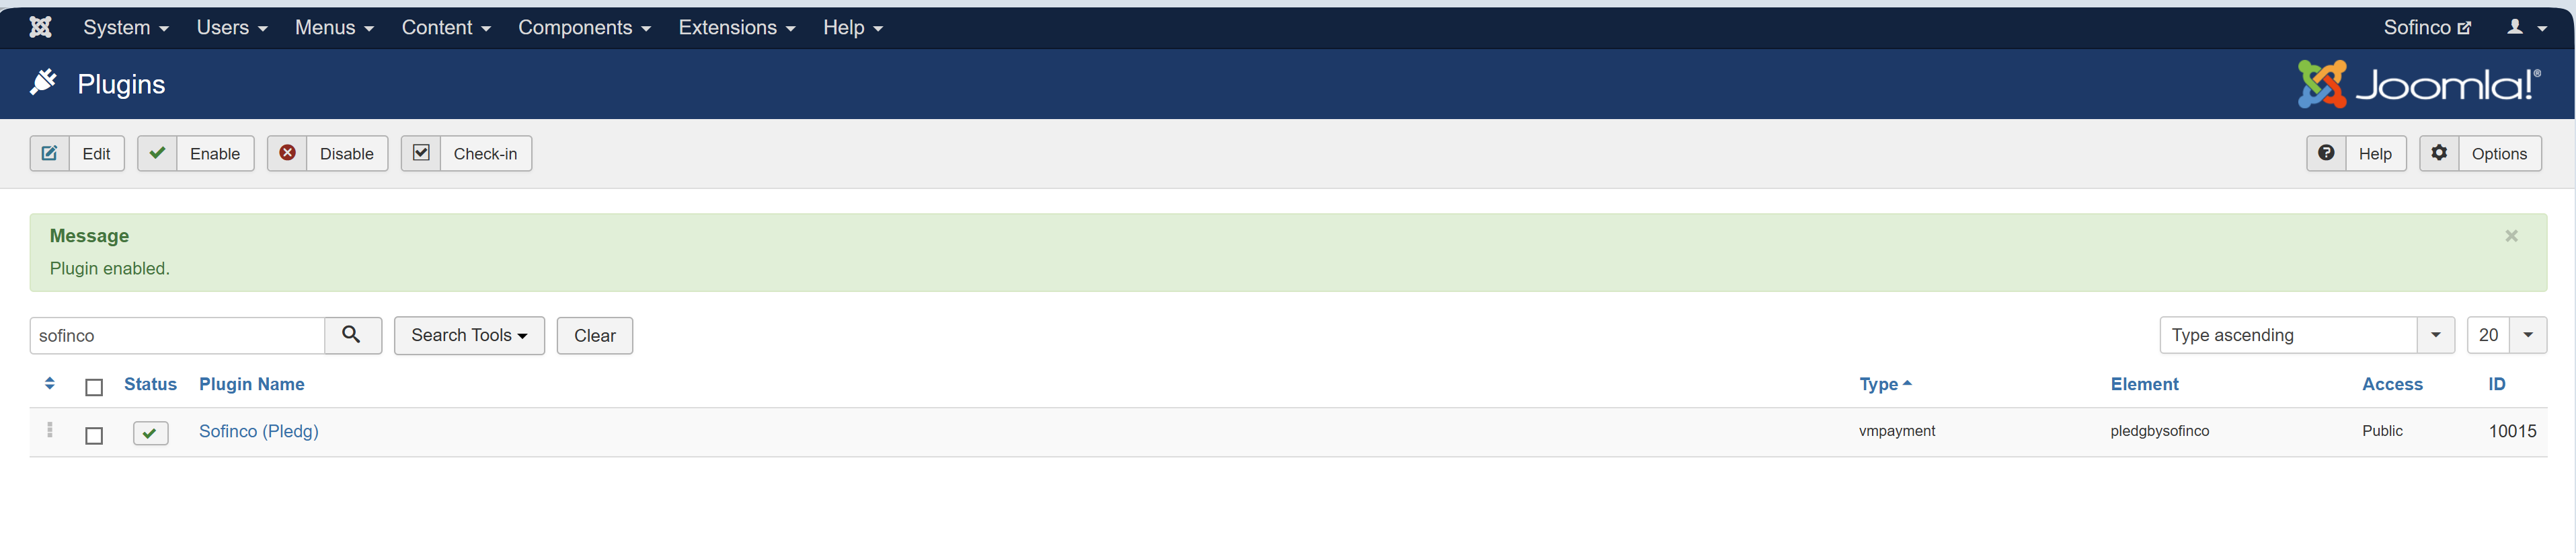
Step 5 - Enable VirtueMart Plugin
- Go to "Extensions" > "Plugins" and search "sofinco"
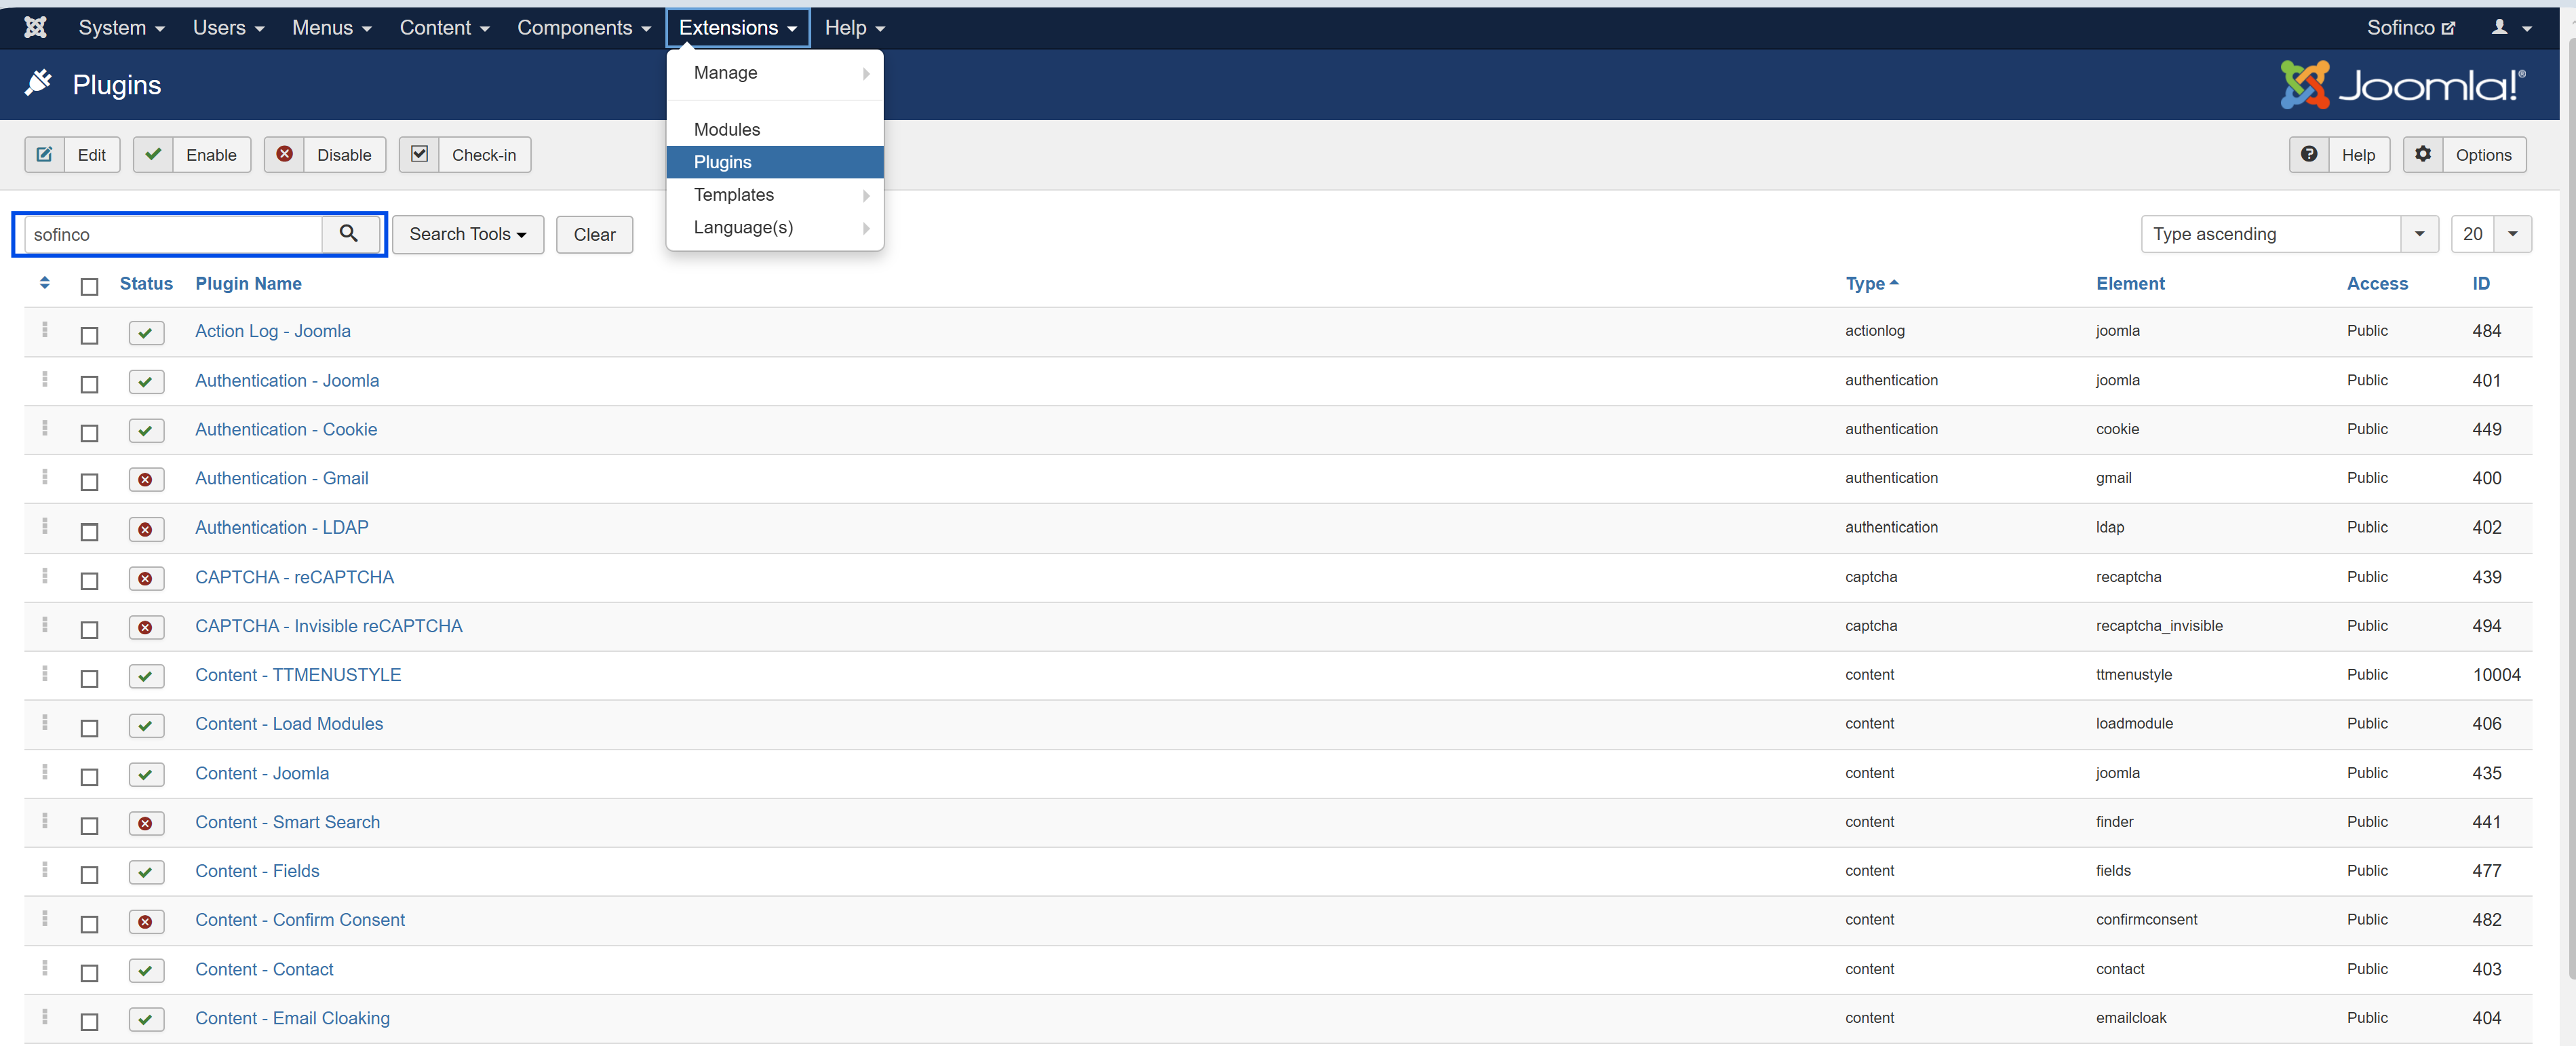
- Enable Plugin "Sofinco (Pledg)"
Step 6 - Test
Carry out a complete test in your environment:
- Fill your basket with items
- Proceed to payment
- Make sure you are redirected to Pledg's funnel
Odoo
Step 1 - Installation
- Download the Zip file for Odoo 17: payment_pledg_odoo17
- Download the Zip file for Odoo 14: pledgbysofinco_odoo_14
- From your machine's terminal, Copy the payment_pledg directory into your Odoo server's addons_path (e.g., addons/ or extra-addons/).
- Restart your Odoo server instance.
- Log in to Odoo as an Administrator and activate the Developer Mode.
- Navigate to the Apps menu and click on Update Apps List in the top menu bar.
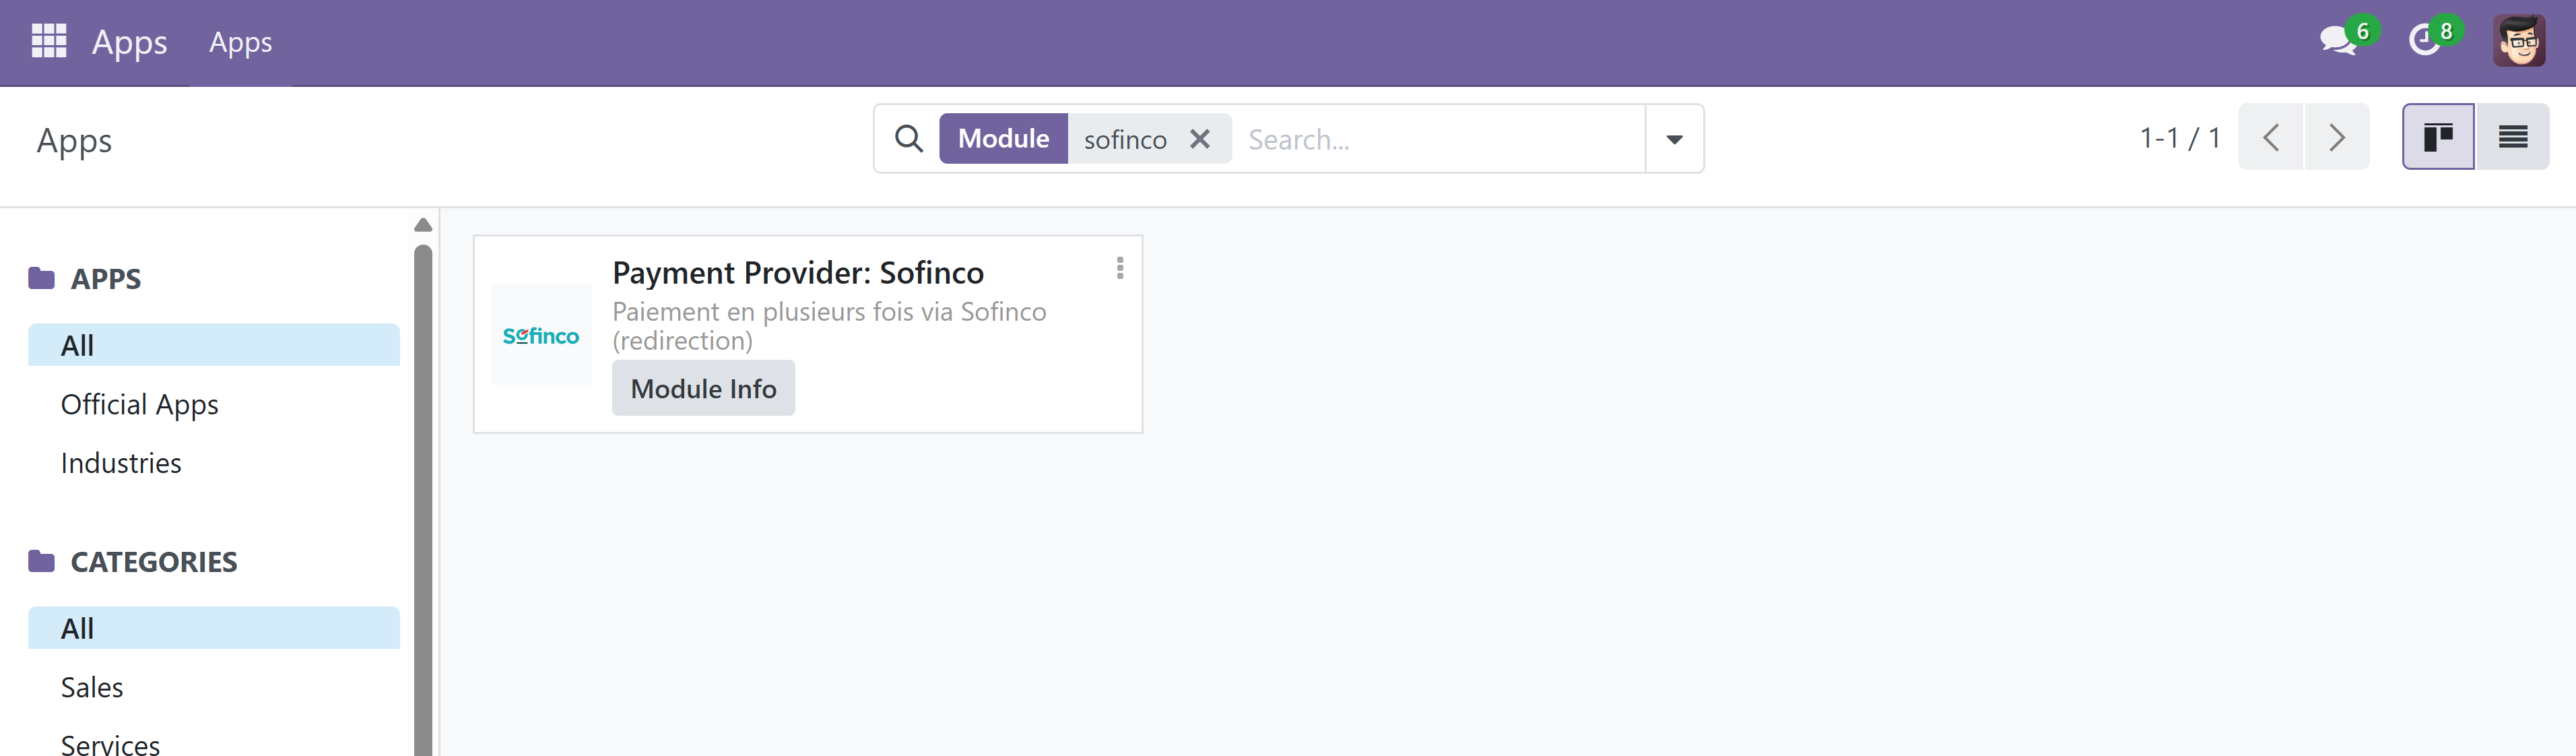
- Search for Sofinco and click Install.
Step 2 - Configuration
- Navigate to Website → Configuration → e-commerce → Payments → Payment providers
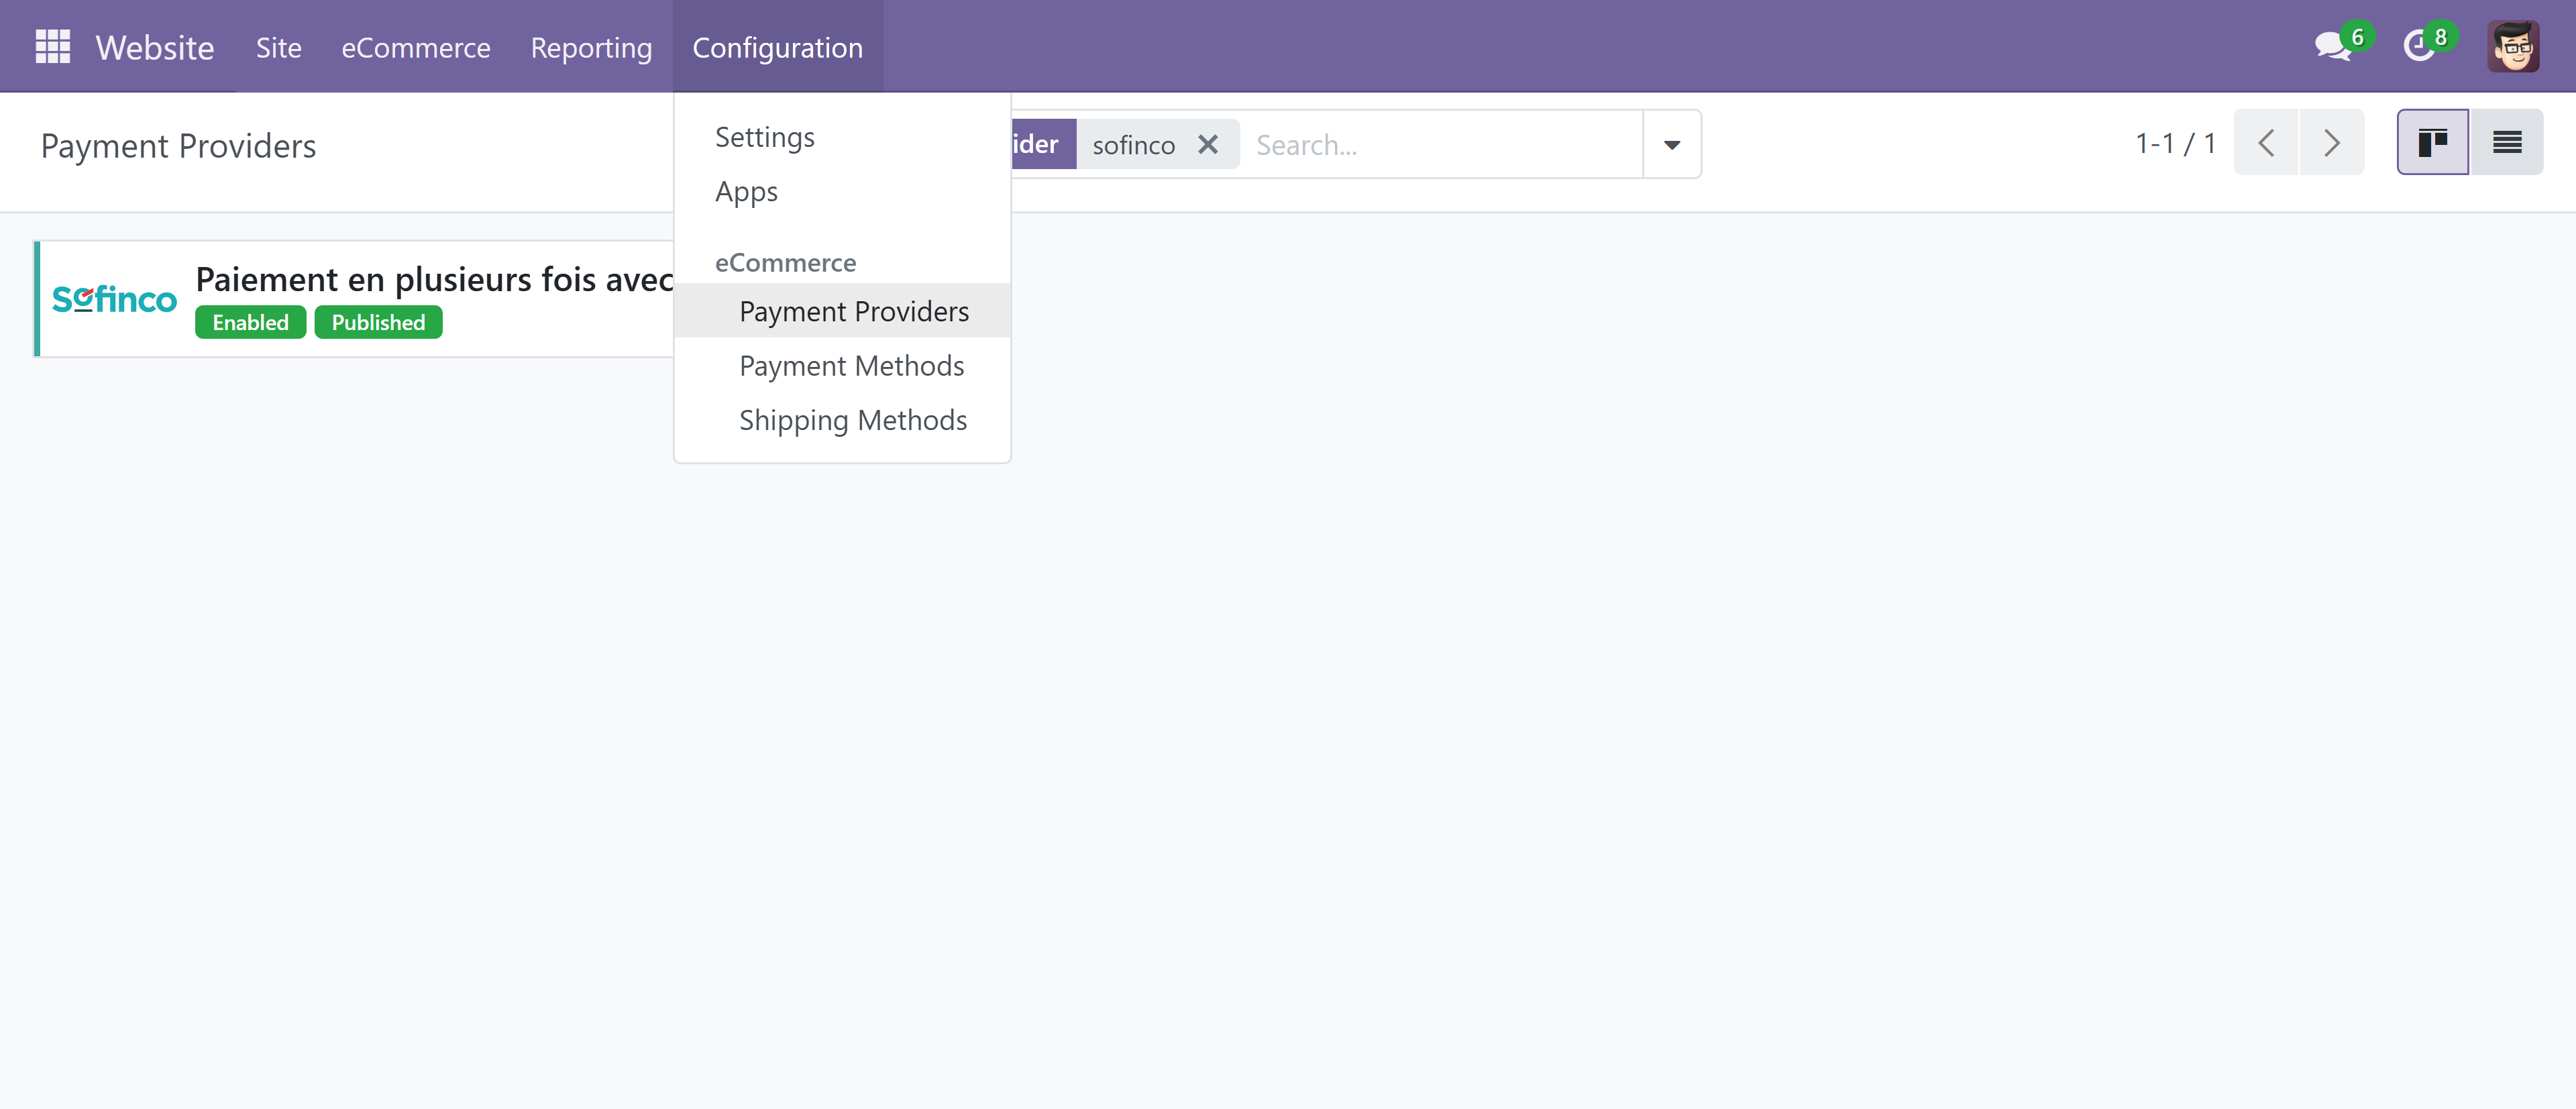
- Search for sofinco and select "Paiement en plusieurs fois avec Sofinco"
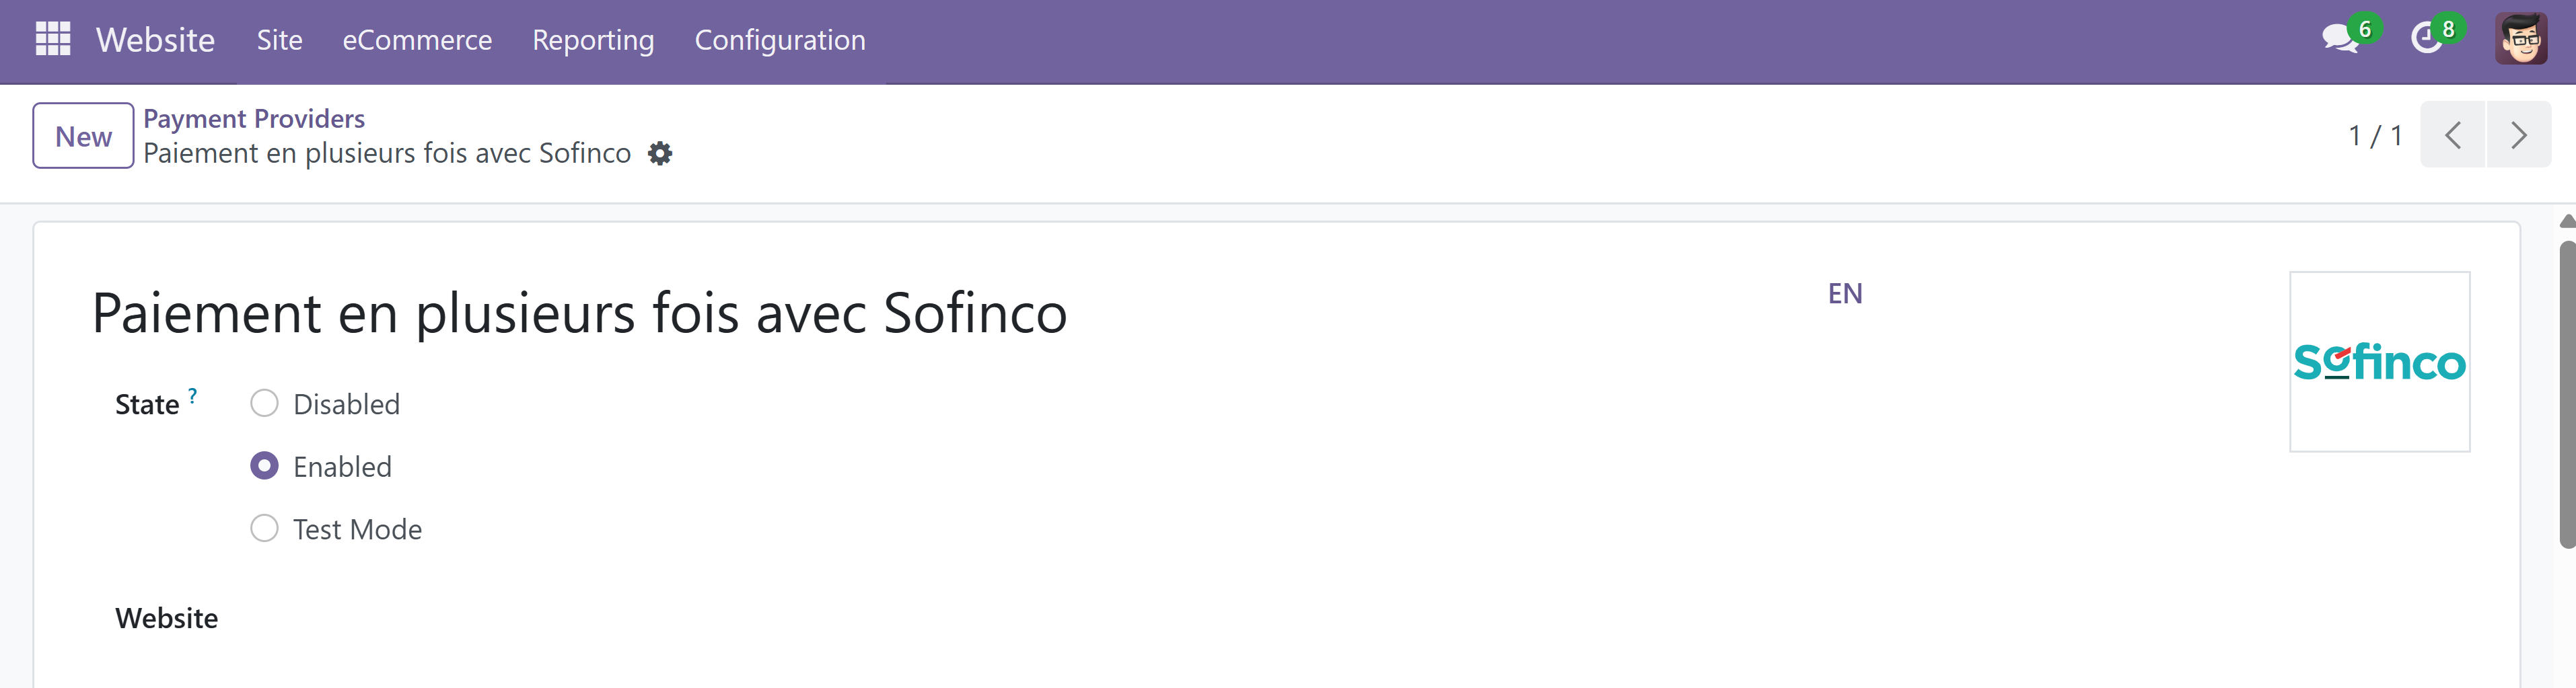
Enable the solution by activating the option " Enabled "
Fill the fields of "Credentials" with Sofinco settings communicated by Pledg : Compagny_Uid, API Key , API secret , JWT Secret

Enable the widget for Catalog,Product and Cart
Activate the "Staging" mode to test or "Production" mode to go live
Test the configuration and save.
Fill in the "Configuration menu" the "min" and "max" fields with amounts declared in your contract.

Step 3 - Test
Carry out a complete test in your environment:
- Check the widgets are activated on catalogue, product and Cart pages.
- Fill your basket with items
- Proceed to payment
- Make sure you are redirected to Pledg's funnel
- Once order is successful, check the Odoo's back office is updated accordingly