Start up
Pledg offers a merchant dashboard as a portal for merchants, to track payments made through Pledg, visualize some configuration parameters, manage collaborators, access KPIs etc... Two are available, one for Staging, one for Production.
Connection
Access for Administrators are created during the Integration phase, by Pledg's integration team, based on a list of a few emails addresses of merchant's admins/collaborators. Then, additional creations/removals can be done by the Administrators themselves.
Various Log in modes are available:
- with Google: once registered, use your usual Google connection method to connect.
- with SAML: a preliminary technical configuration phase is required, done during the Integration phase. Then use your usual SSO connection method to connect.
- with an email/password + authentication code sent by email (MFA) - DEPRECATED
- with an email/password + an authentication application/extension (QR code)
If using those last modes, to log in:
- Click on "Log in"
- Enter your Email address & Password, and follow instructions
- If needed, use the 'Forgot password?' service to initialize/reset your password, and apply instructions sent by email.

General presentation of the dashboard
Once connected, you will be taken to the main interface of the Pledg dashboard.

Here you will find the list of your accounts (=your Pledg payment method) with a short description (e.g. "2x Instalment"). Note you can change the language of the dashboard Click on "Logout" to exit the dashboard.
Here you will find:
- The list of your accounts (=your Pledg payment solutions) with a short description (e.g. "2x Installment").
- Yon can search among your list of payment solutions setup
- You can change the language of the dashboard
- Click on "Sign Out" to exit the dashboard.
Consulting an account
In the accounts, click on the account / Pledg payment method you want to view.

On the right side of the screen are displayed:
- The main characteristics of the payment methods
- The list of the last payments
- The list of the last transfers
Key Account Features

- UID: the technical identifier of your payment method also called Merchant ID
- Secret Key: technically helps to sign messages between Merchant and Pledg. Required for security purposes.
- Payment Type: the type of payment configured: "Split", "Deferred", "Installment" ...
- .../...
Collaborators
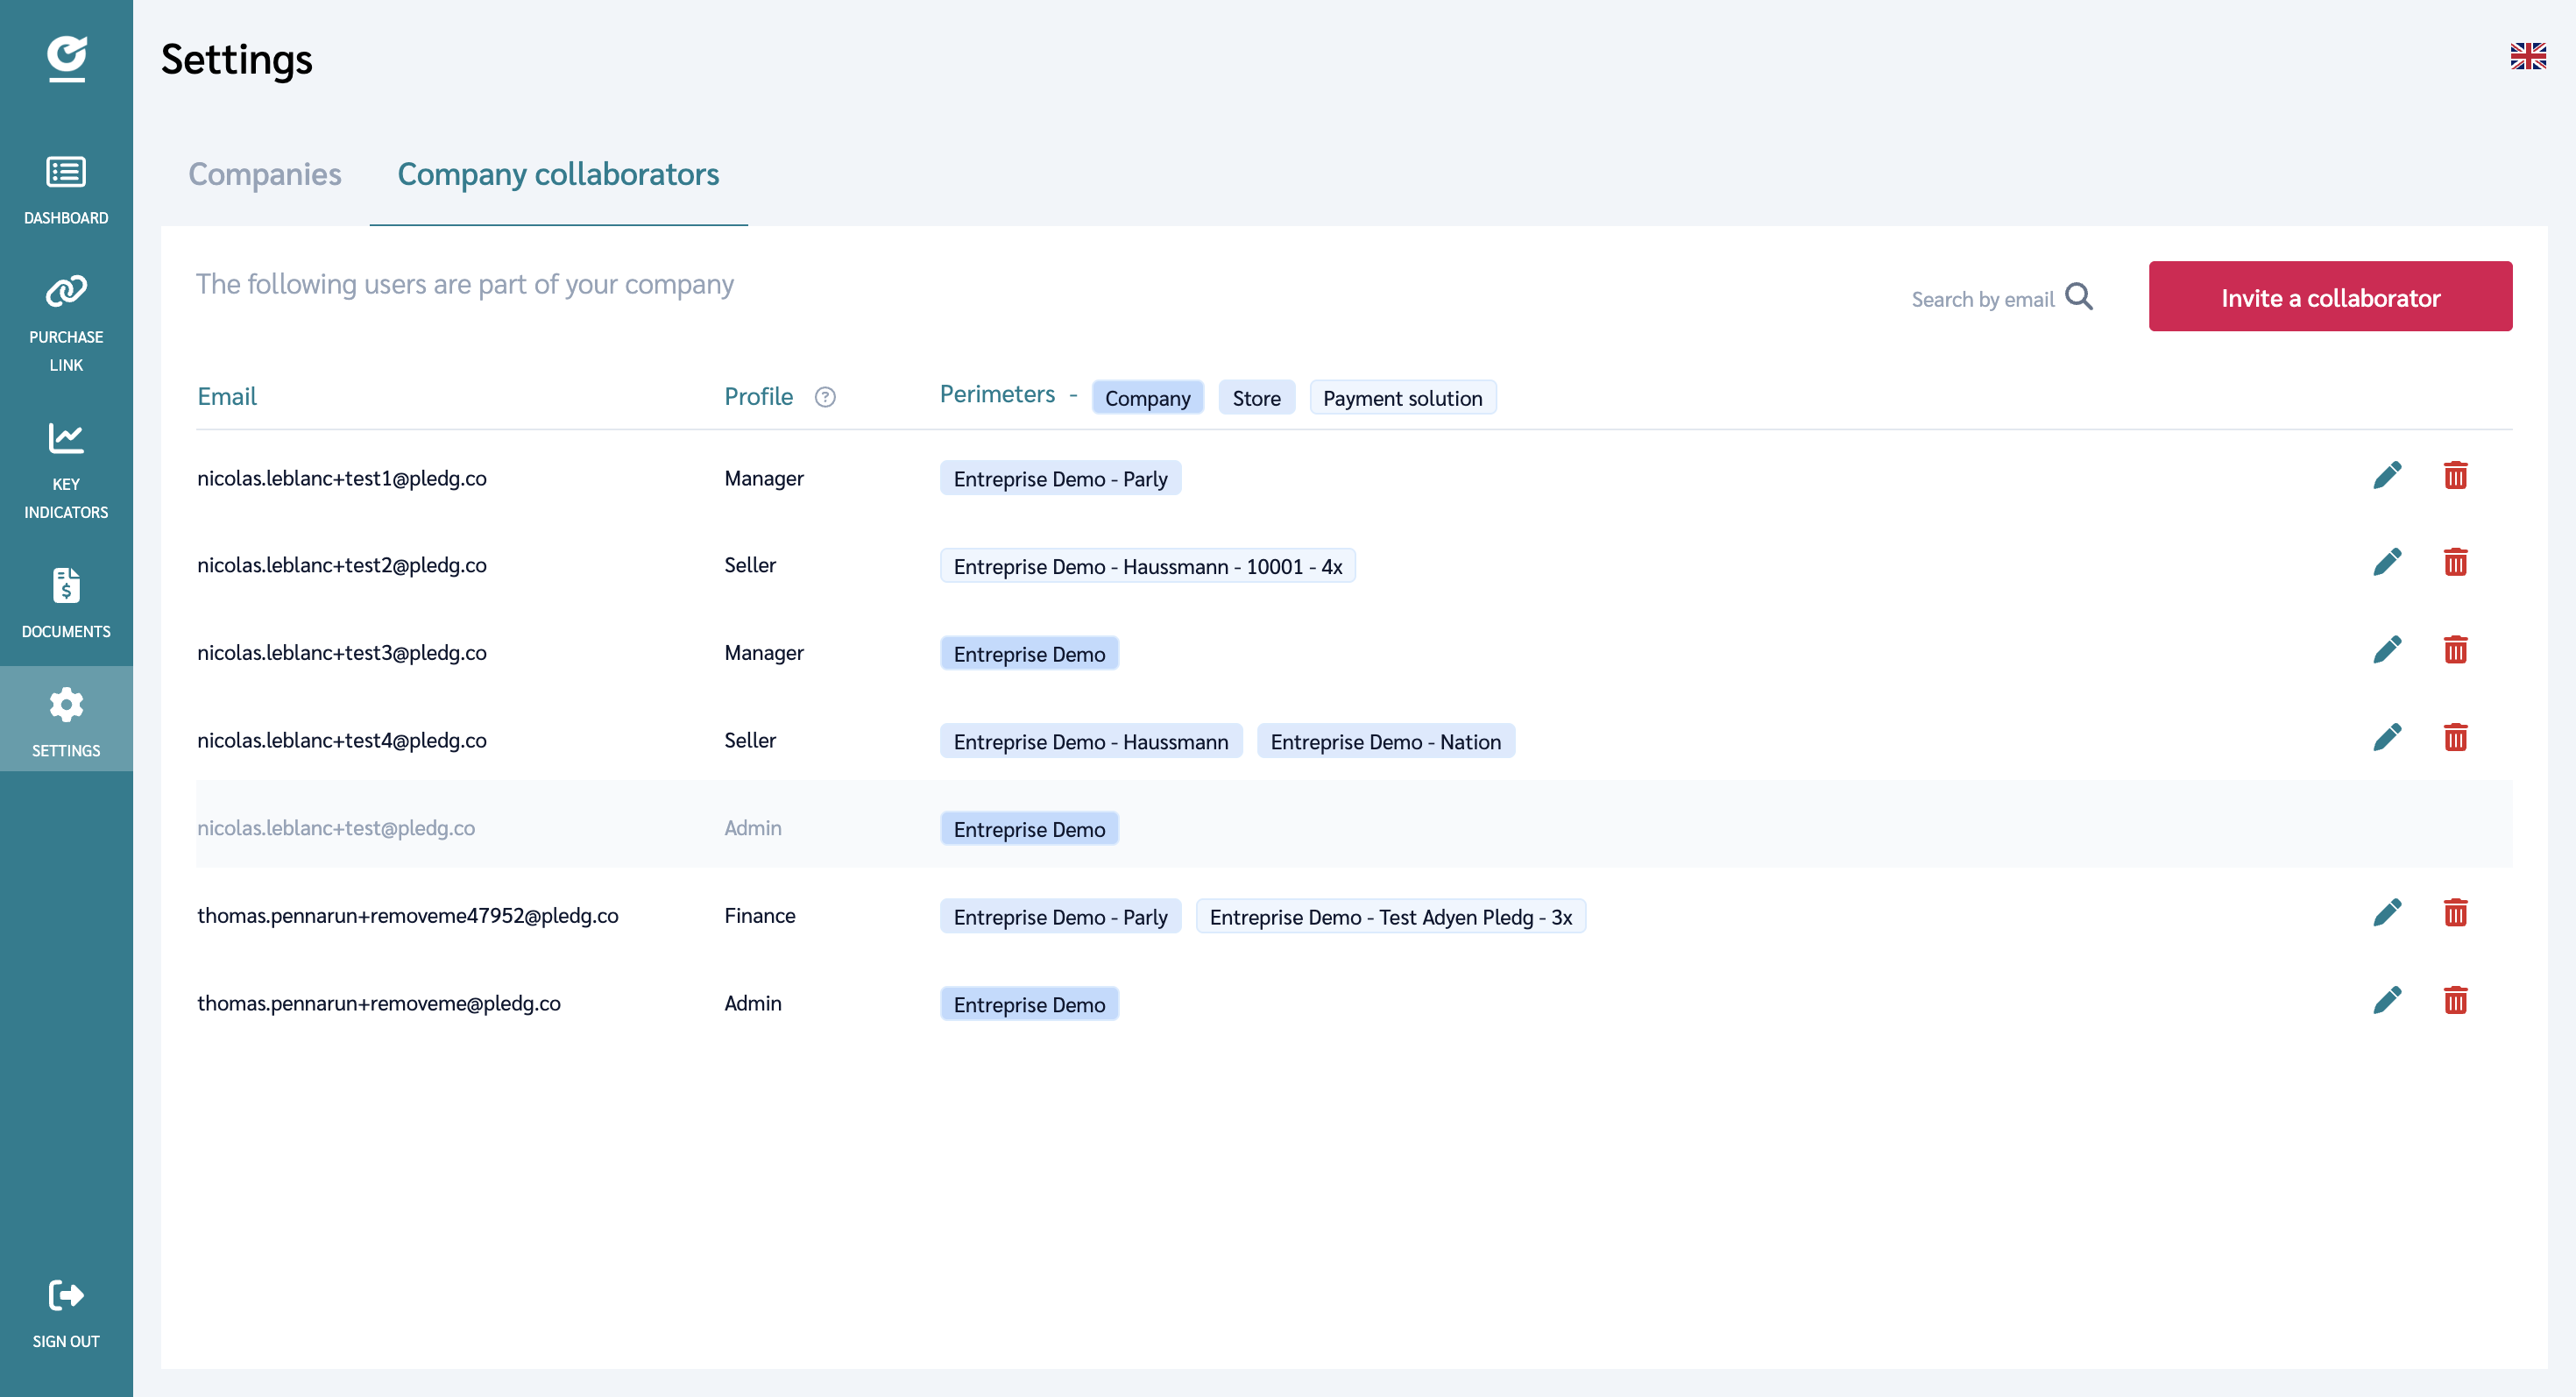
Access
ADMIN only (only these profiles can see the Collaborators page) can see the list of people in your organization that have dashboard access, with their profile and their scope.
Available Profiles
The existing permission profiles are:
- KPI_VIEW - access limited to Key Indicators section
- ANALYST_VIEW - KPI_VIEW + read only: purchases, orders
- FINANCE_VIEW - ANALYST_VIEW + read only: transfers view, Invoices & Credit notes view
- OPS_SELLER - read only: purchases, orders + purchase link generation
- OPS_MANAGER - OPS_SELLER + purchase management, refund, transfers view, Invoices & Credit notes view, KPIs view
- ADMIN - OPS_MANAGER + user management, payment solutions settings…
Search a user by email
You can check if a user exists and/or has active access (e.g., remove access if they left the company).

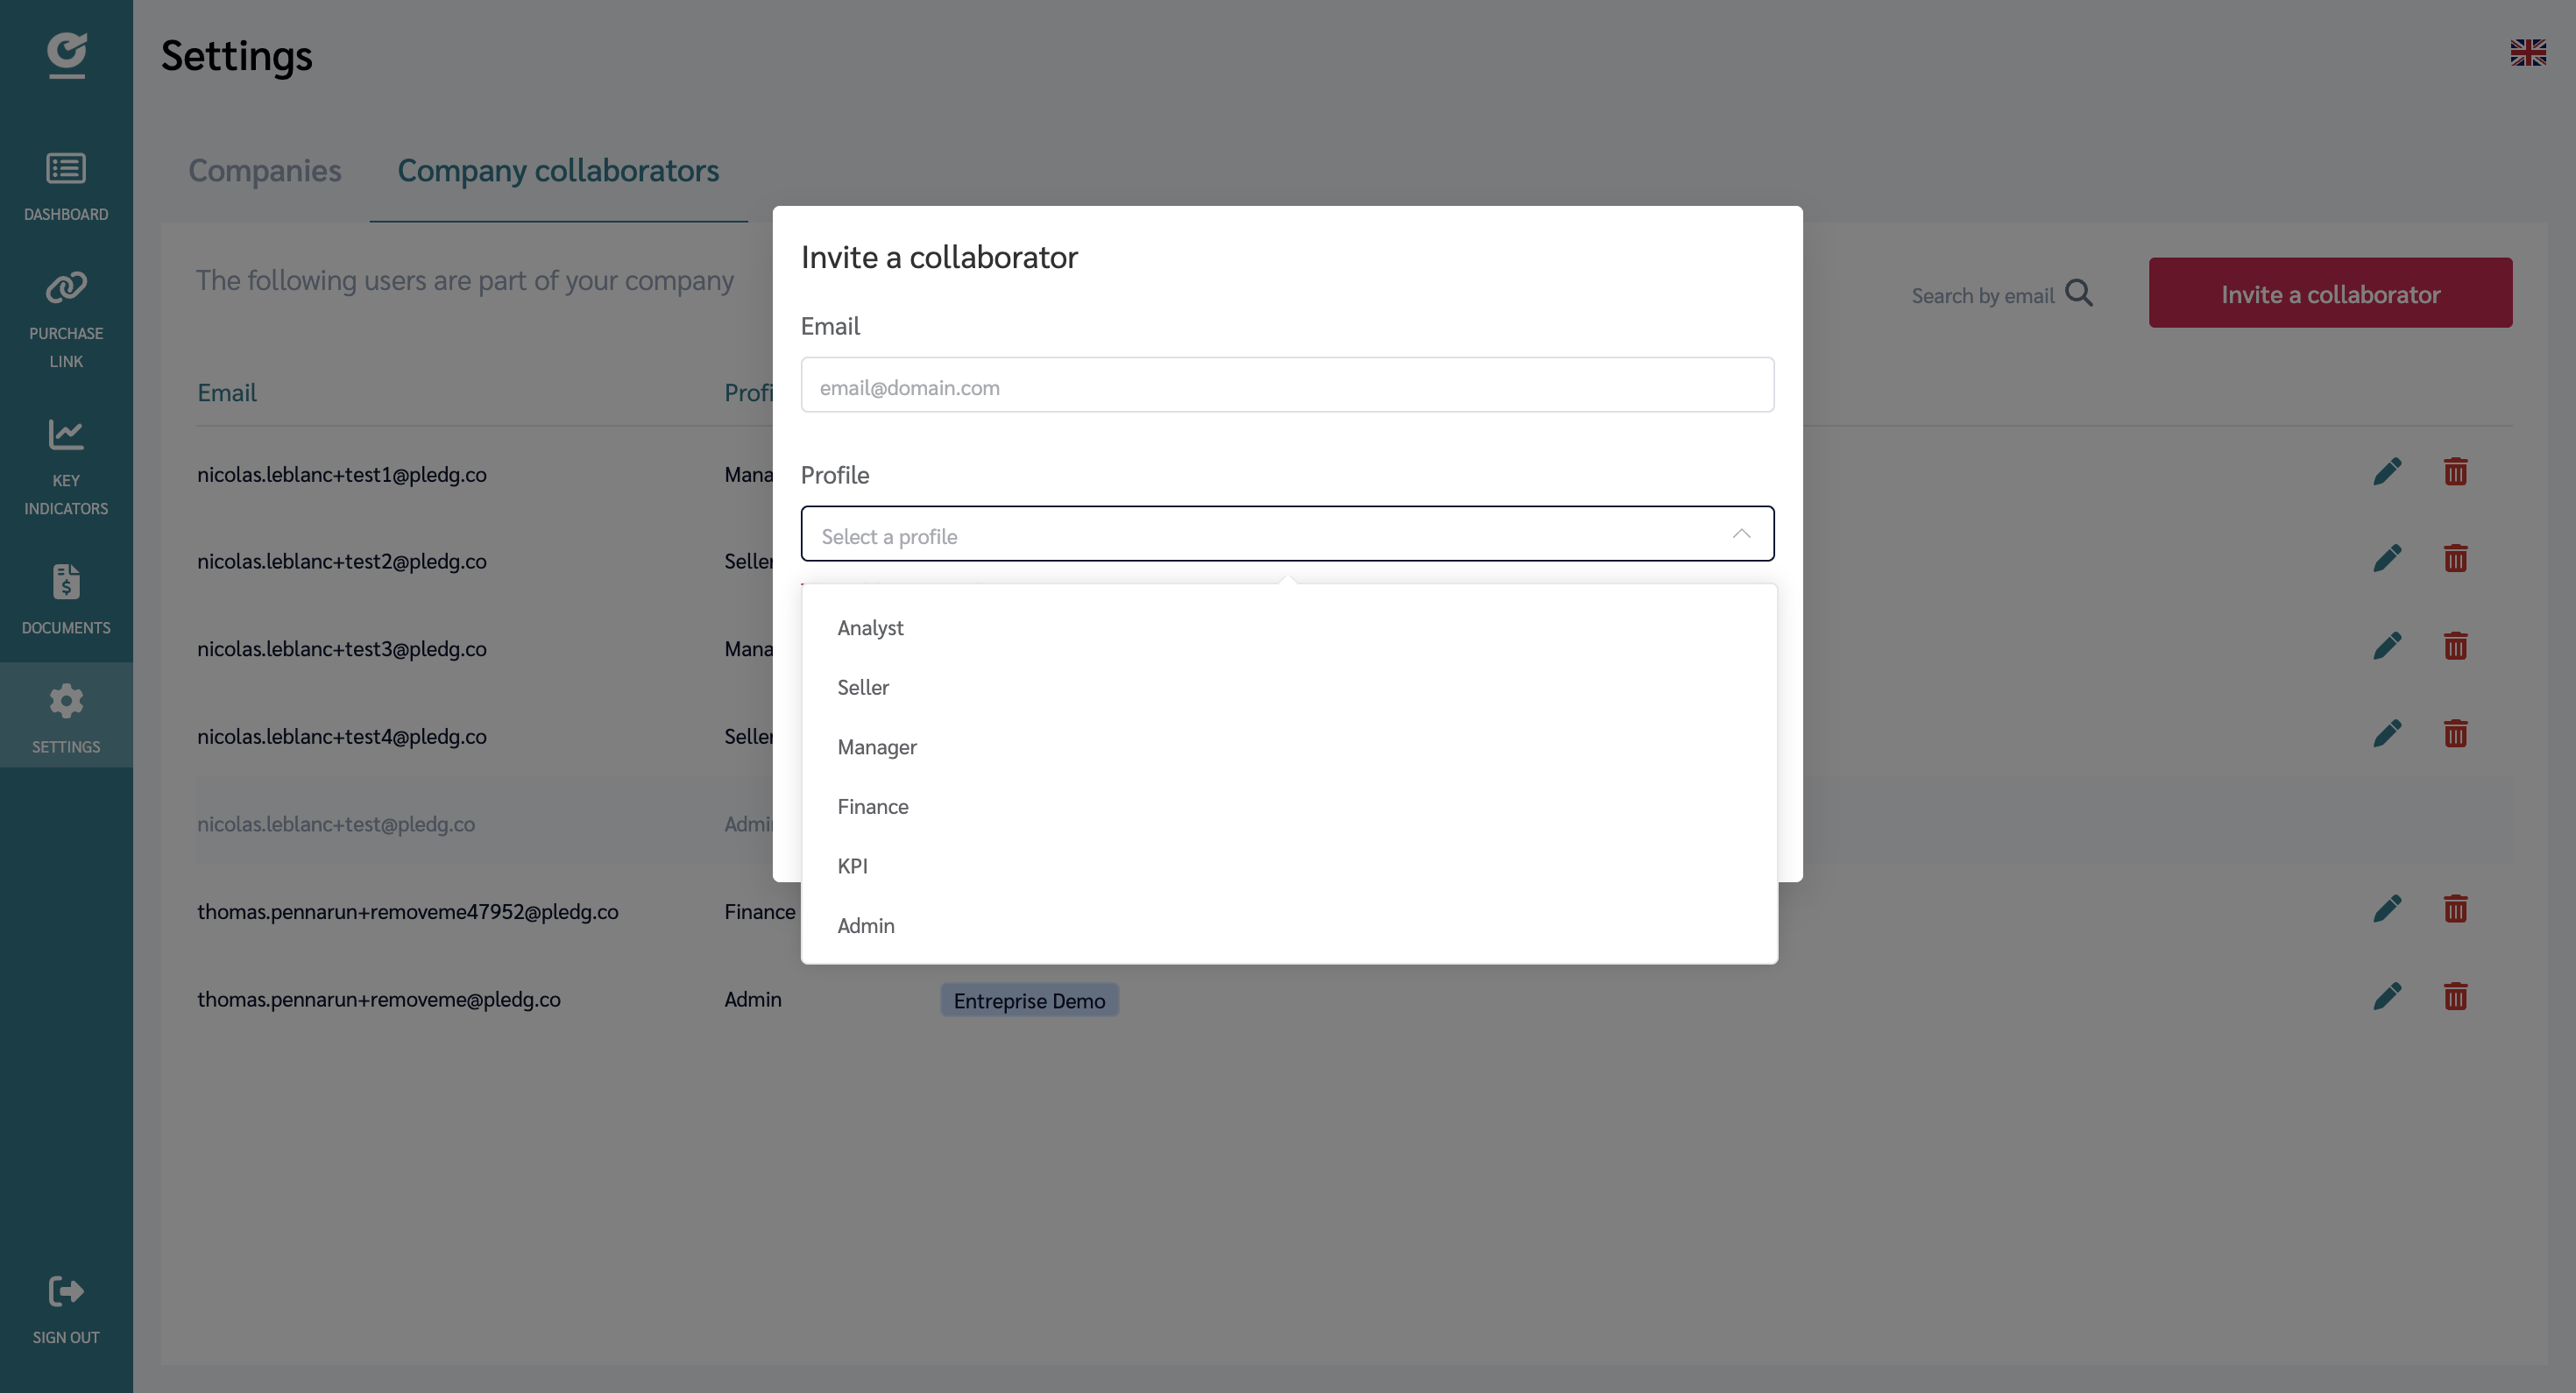
Invite a collaborator
You can add a user with a specific profile and scope.
How to:
- Click "Invite a collaborator"
- Enter the Email
- Choose a Profile (see list above)
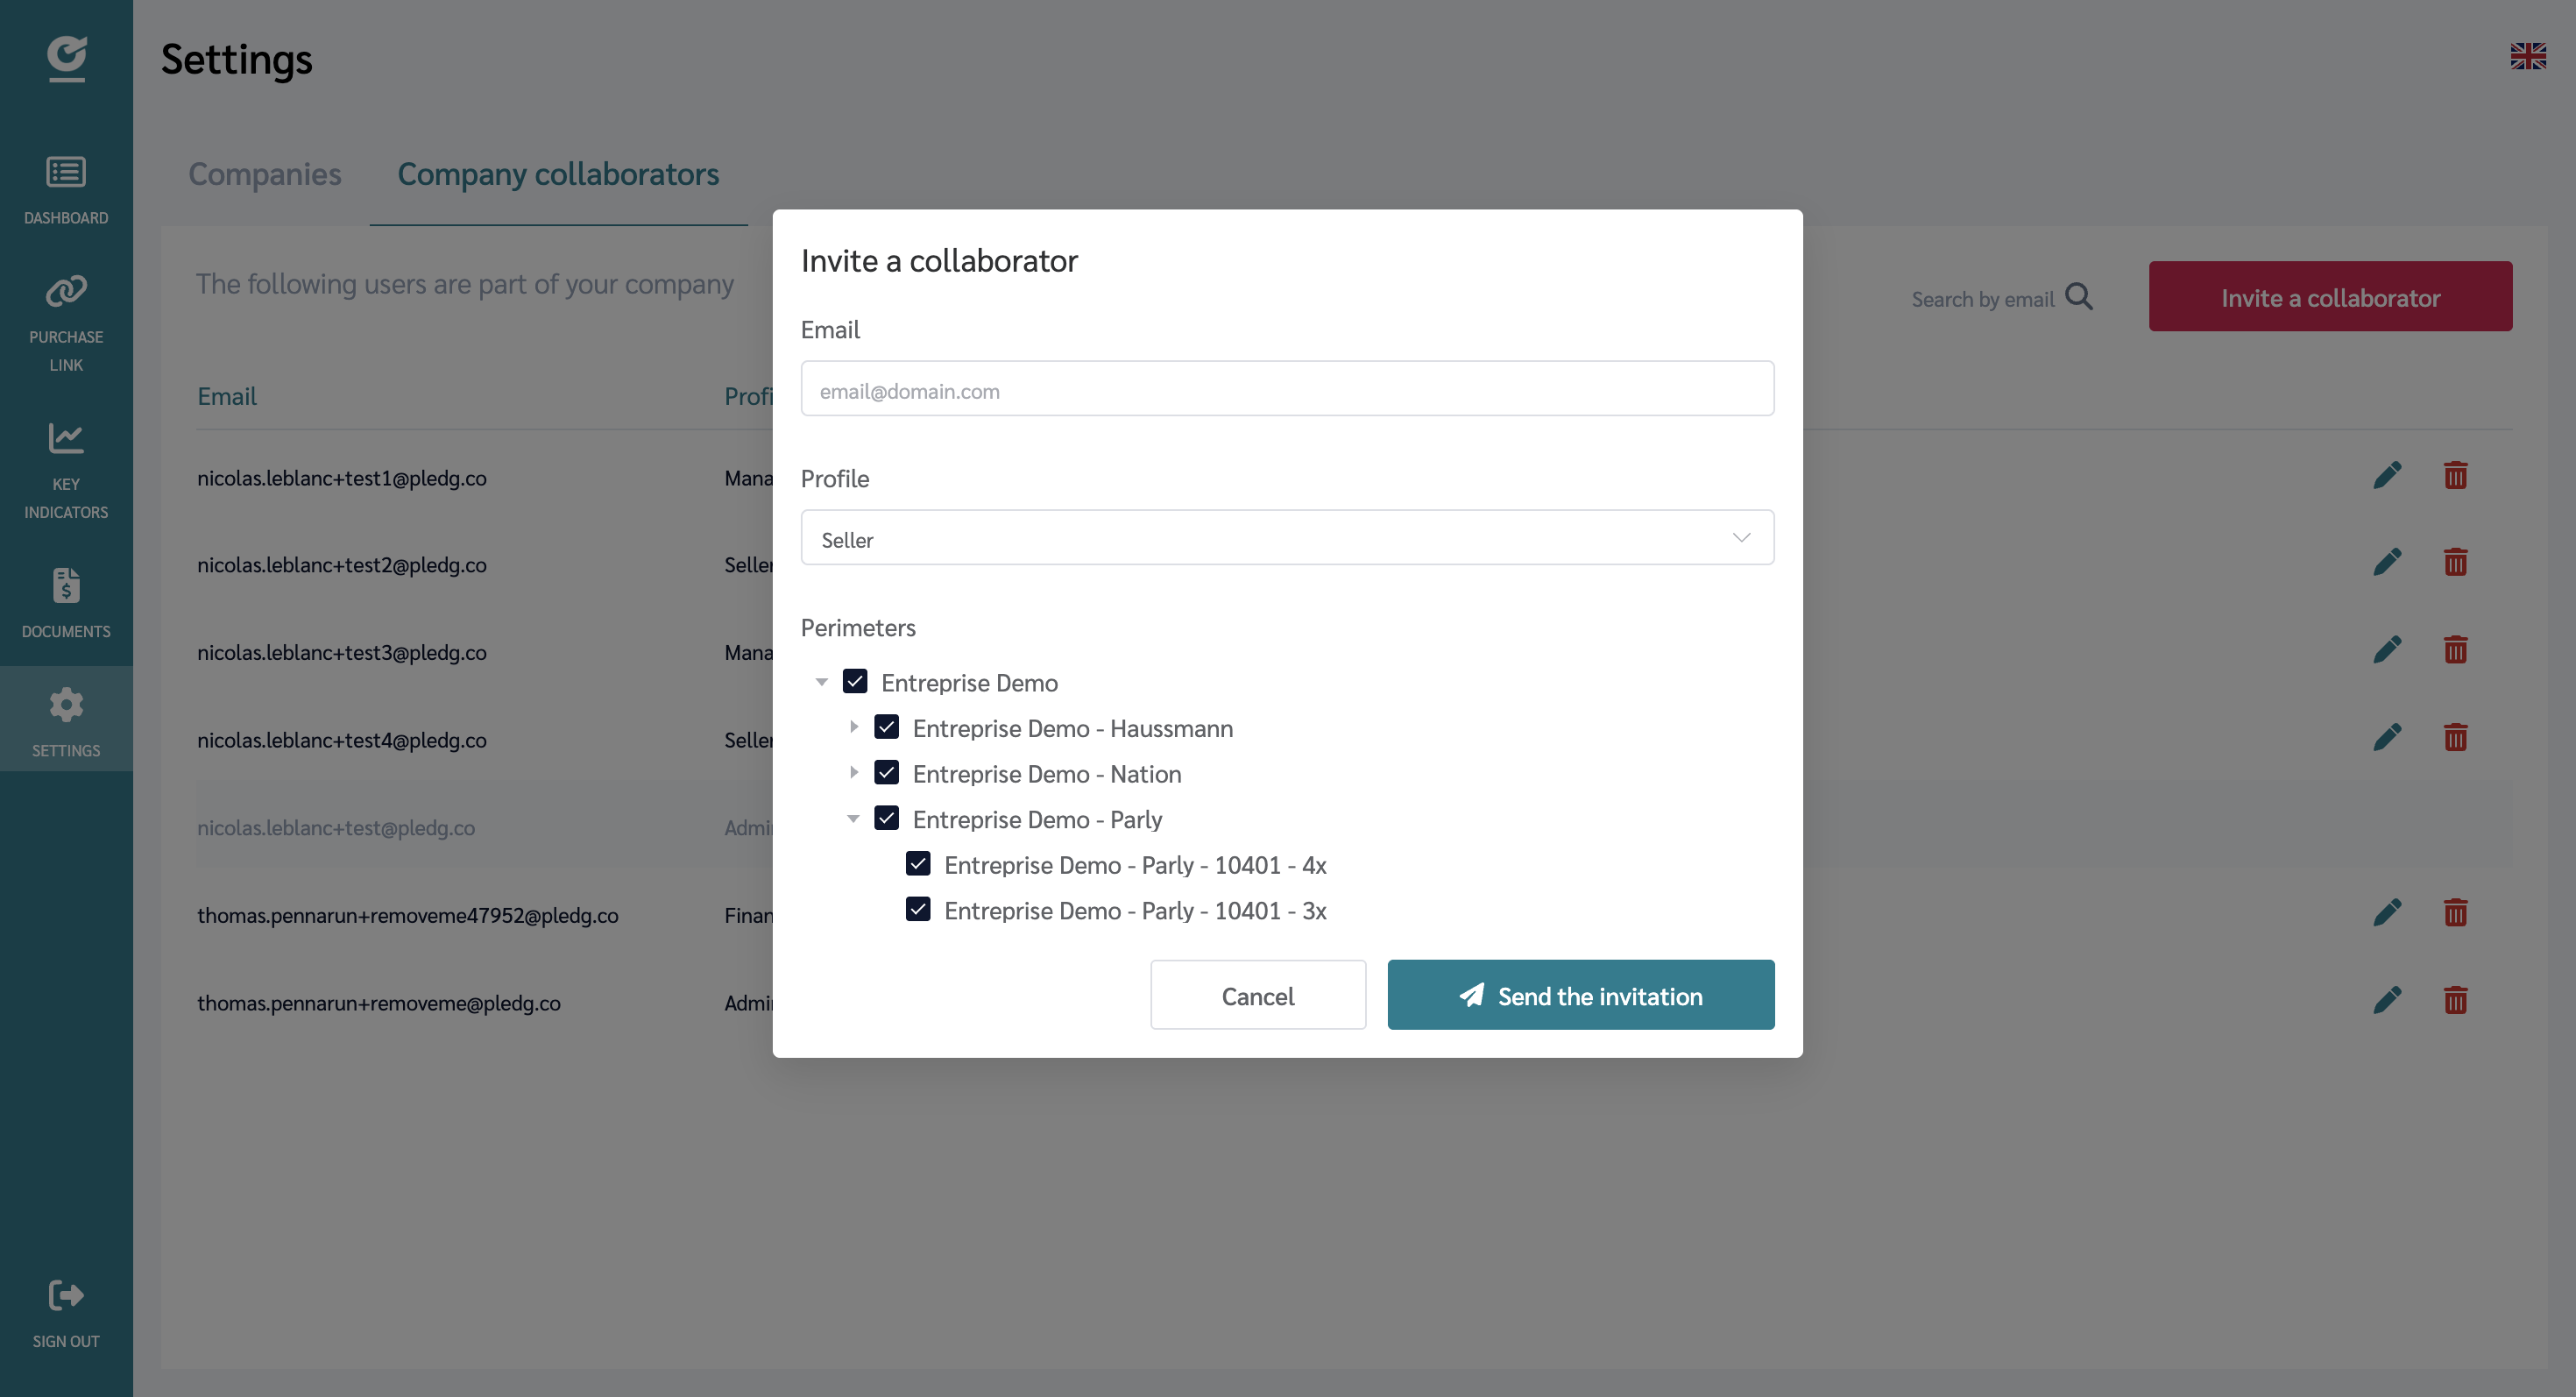
- Define the Scope:
- "Same as mine": the user inherits your exact scope
- Custom: choose Entire organization, or a subset of Store (online/physical), and/or specific Payment solutions
- Click Validate
Note: you cannot grant a scope broader than your own. An already invited person cannot be reinvited - it has to be edited in the displayed list.
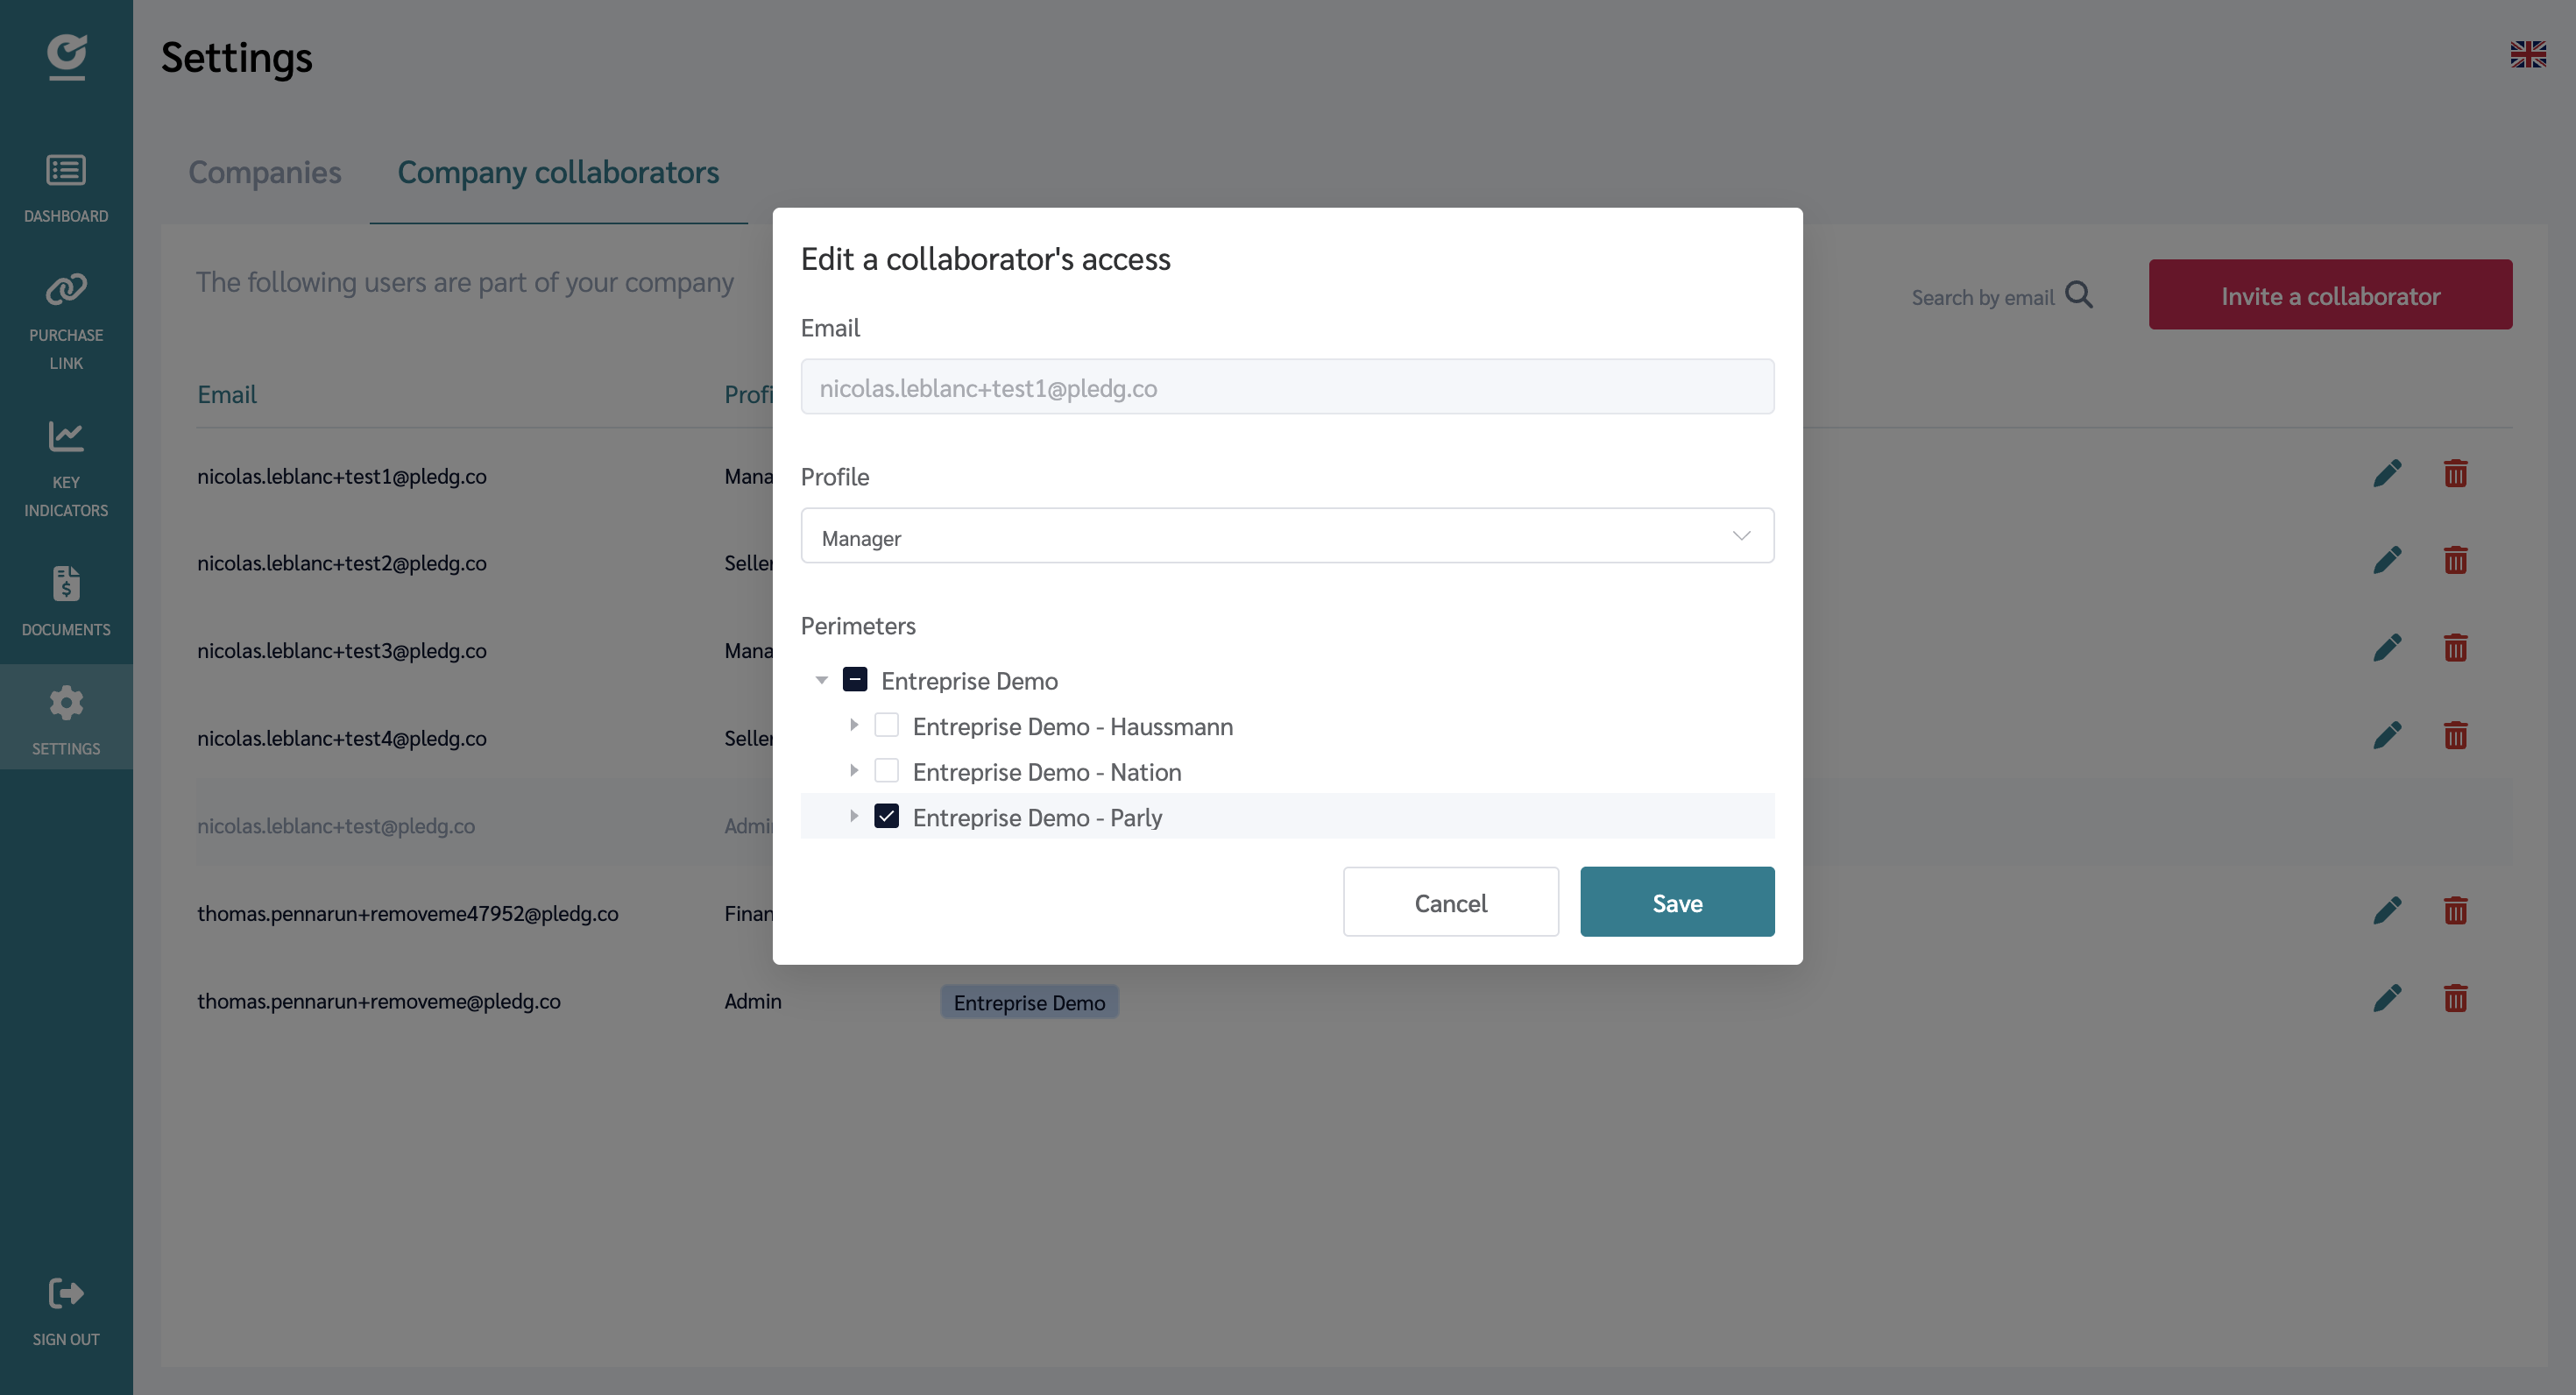
Edit a collaborator profile and/or scope
You can adjust profile permissions and/or broaden/restrict the access scope (organization, store, solutions).
An ADMIN can only grant or remove access to entities that are within their own scope.
Examples:
- ADMIN Organization → can manage all store and solutions
- ADMIN Store A → can manage only store A and its users (this stands for wider company)
- ADMIN Solutions X/Y on store A → can manage only X/Y on store A
How to:
Profile
- Click the “🖊️” icon
- Select the new profile
- Click Validate
Scope
- Click the “🖊️” icon
- Choose a customed scope (authorized selections)
- Click Validate
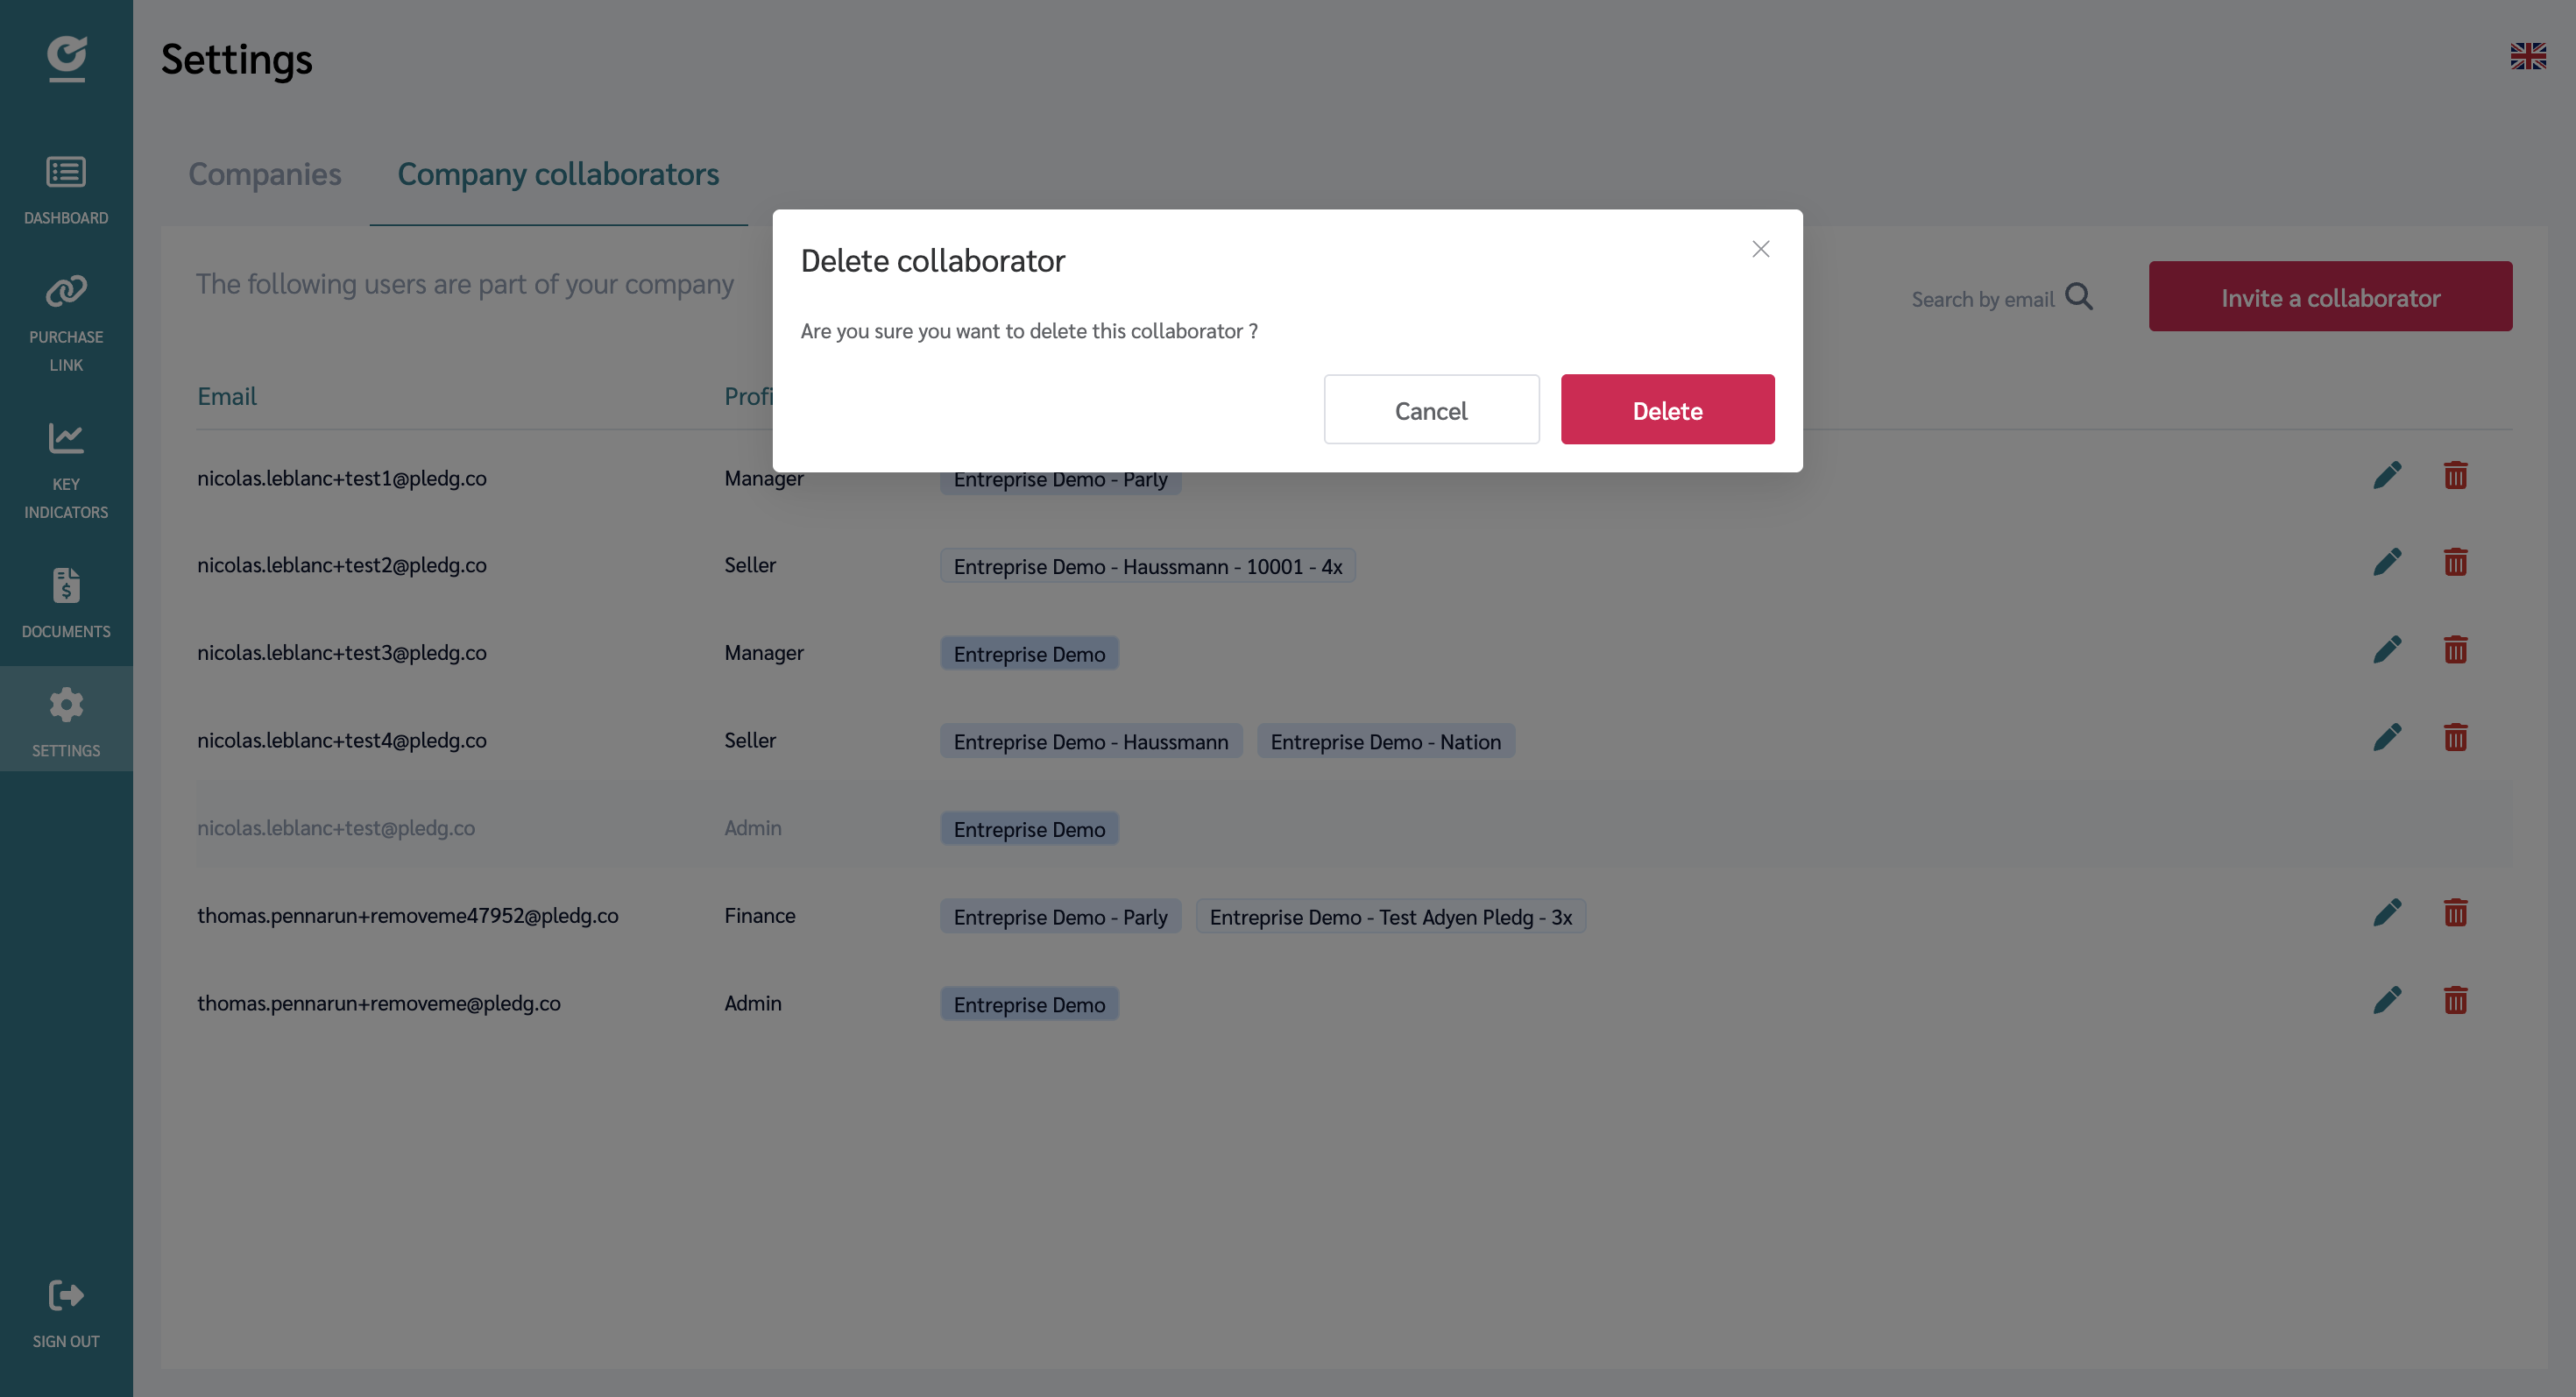
Remove a collaborator
By clicking on “🗑️” and confirming in the modal, you immediately revoke all access (Organization / Store / Solutions) from a user in your scope.
Viewing last payments
In the list of accounts, click on the account / payment method for which you want to view the latest payments.

The list of payments is displayed with:
- Transaction reference associated to Pledg payment
- Payment status:
Accepted: Payment acceptedRejected: An error occurred or the transaction has been refused. The payment could not be finalised.Abandoned: Your customer did not finalised their payment.Not initiated: Your customer did not entered the Pledg payment tunnel. He did not open the link received by email or SMS (purchase link).
- Customer identification: email and phone number if available.
- The amount and its currency
- The date of payment
- Further details in case of error, with the error type:
Not eligible: The information provided does not allow Pledg to finance the purchase (conditions of the payment solution not respected, falsified contact information, etc).Customer's bank refusal: Your customer's bank did not authorised the transaction (insufficient funds, 3DS check not completed, etc).Pledg refusal: The credit score was too low for financing to be granted or the transaction was refused by Pledg's insurer.Technical error: An error occured. Try again later or contact Pledg's support.
You can see more details by hovering your mouse over the error type.
Searching payments
All payments are displayed by default in the Purchases view. You can browse transactions for one or several payment methods using the "select mutliple" button.
You can use filters to investigate and find specific transactions. In particular, you can filter by state, date, amount,
- Search for a payment by typing the merchant's reference number
- Filter the list by date, status and amount
- Export list items in CSV format
To obtain the details of a payment, click on the payment line.
Viewing the details of a payment
Click on the line presenting the payment you want to view.

The main features of the payment are listed below:

Detail:
- Date: the date on which the transaction was made
- Reference: the reference transmitted to Pledg from your merchant site.
- Transfer (
transfermode only): the reference of the transfer made to the merchant to pay for the purchase. - Virtual card (
backmode only): the status of the virtual card with our bank.
The meaning of the status is detailed below:
| Status | Meaning |
|---|---|
AUTHORIZED ON TIME | the bank received a request for authorization from the merchant within 3 minutes of the card generation |
NOT_AUTHORIZED_ON_TIME | the bank did not receive any authorisation request from the merchant even after 3 minutes |
AUTHORIZED | the bank received a request for authorization from the merchant |
DEBITED | the bank has received a debit request from the merchant |
DEBITED_LOWER_AMOUNT | the bank has received a request from the merchant to debit an amount less than the authorised amount |
DEBITED_GREATER_AMOUNT | the bank has received a debit request from the merchant for an amount greater than the authorised amount |
NOT DEBITED | the bank has received a debit request from the merchant for an amount greater than the authorised amount |
CREDITED | the bank received a credit application from the merchant |
Maturity dates
- For a split payment, you will find the list of due dates, amounts and associated statuses:

- For a deferred payment, you will find the due date with its date, amount and associated status:

- For a split payment, you will find the list of due dates, amounts and associated statuses:

- Refunds / Refunds
Partial or full refunds can be made on payment. You have the option of monitoring the status of refunds or making a refund request for accounts set up in transfer mode.

If repayments have been made, the list of repayment transactions is displayed.

To refund a customer, the operation is different between the modes using a virtual card (back mode) and the transfer mode:
Mode
back(with virtual card): connect to your PSP (Payment Service Provider) and re-credit the virtual card; the customer's bank card will be re-credited afterwards.Mode
transfer: the claim is made from the dashbord Pledg:- Click on the button "Request a refund".
- Fill in the amount you want to reimburse
- Click on "Request a refund"; a notification will tell you that the refund has been taken into account.

Notes concerning the transfer mode
TIP
To refund the full amount of a customer's order, you must fill in the total amount of the customer's order; If you fill in the amount corresponding to the due dates drawn, this will correspond to a partial refund and the other due dates will be debited. To refund partially a customer's order, enter the amount you want to refund. This partial request will not necessarily produce a credit on the customer's credit card. The amount you want to refund will reduce or cancel the customer's most distant debit dates in priority.
TIP
Refunds are usually effective at D+1 and will appear at that time in the payment refund list in the dashboard.
View latest transfers
For accounts set up in `transfer' mode, i.e. a daily transfer is sent to the merchant for an amount corresponding to all the orders of the day, the list of transfers made can be consulted.
This section allows you to reconcile the payment of your orders with the transfers you receive on your bank account.

Information:
- Amount: the amount of the transfer
- Status:
sentwhen the transfer has been successfully issued - Reference: the reference of the transfer transmitted
- Date: the date of the transfer
Click on the "View All" button to see a list of all transfers. You can then view the details of a transfer with a list of the orders concerned.

In the "Payments" section, you can consult the list of corresponding orders and the reference you have sent to Pledg.
When the amount is negative, this corresponds to a refund. When you make a refund request, we take the refund amount from your bank account and credit the customer's credit card.